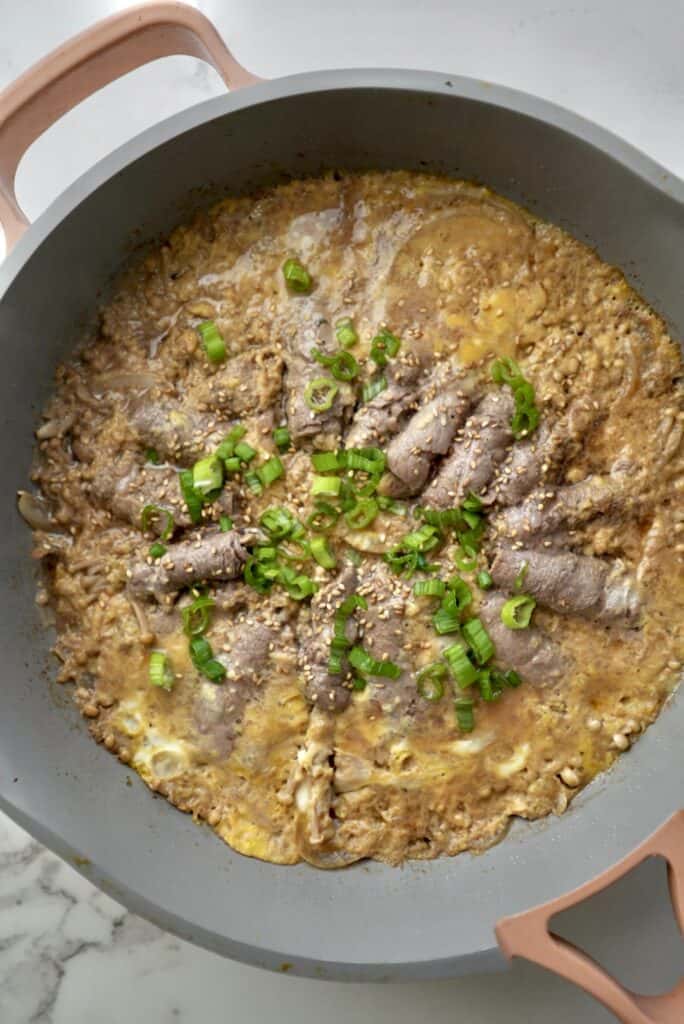
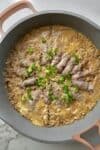
These viral Enoki Beef Rolls are proof that a handful of simple ingredients can come together into something super yummy. Thinly sliced beef is wrapped around bundles of enoki mushrooms, creating a contrast between the tender meat and the mushrooms’ chewy, noodle-like texture. As the rolls cook, the enoki soften slightly.
The beef rolls are nestled over a bed of sautéed onions, which become sweet and tender as they cook. The onions add a subtle sweetness that balances the rich beef and earthy mushrooms, while also creating a flavorful base for the dish. Once everything is cooked through, beaten eggs are poured over the top and cooked until just set. This creates a soft, silky finish that ties all the flavors together. Seriously so good!
This Enoki Beef Rolls dish is very similar to gyudon in both technique and flavor profile, even though the ingredients are a bit more elevated and texturally interesting. Like gyudon, it starts with a savory base of onions simmered until sweet and soft, which forms the foundation of the dish. In gyudon, the onions are cooked in a soy-dashi-mirin mixture. Here, you’re building the same kind of balanced Japanese-style seasoning that leans salty, slightly sweet, and deeply umami.
Ingredients:
- Thinly sliced beef: wraps easily around the mushrooms and becomes tender and flavorful as it cooks.
- Enoki mushrooms: add a delicate, noodle-like texture and subtle crunch that contrasts beautifully with the beef.
- Onion: becomes sweet and tender when sautéed, creating a flavorful foundation for the dish.
- Eggs: provide a silky, custard-like finish that brings everything together.
- Ginger: adds warmth, freshness, and a subtle spicy aroma that cuts through the richness of the beef and egg.
- Soy sauce: adds savory depth and umami.
- Mirin: contributes sweetness and a subtle glaze.
- Dashi: helps create a light, flavorful sauce.
- Green onions: add freshness and color as a garnish.
How to Make Dashi: Japanese Cooking Stock
There are three main ways to make dashi, each with its own advantages in terms of flavor, ease, and time. I ordered them from most complex to simplest:
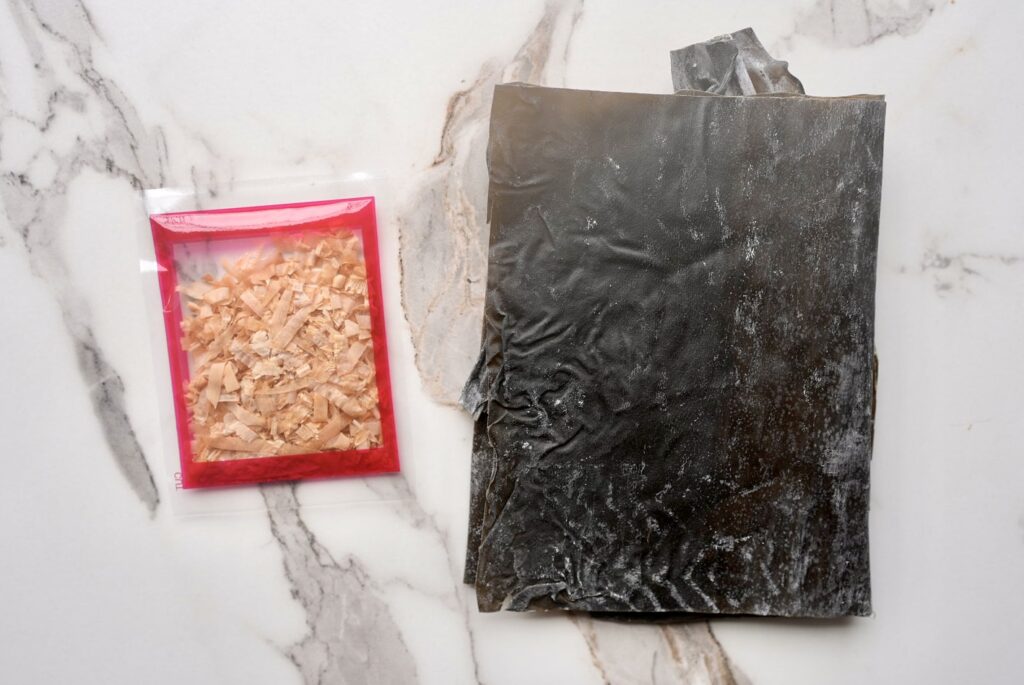
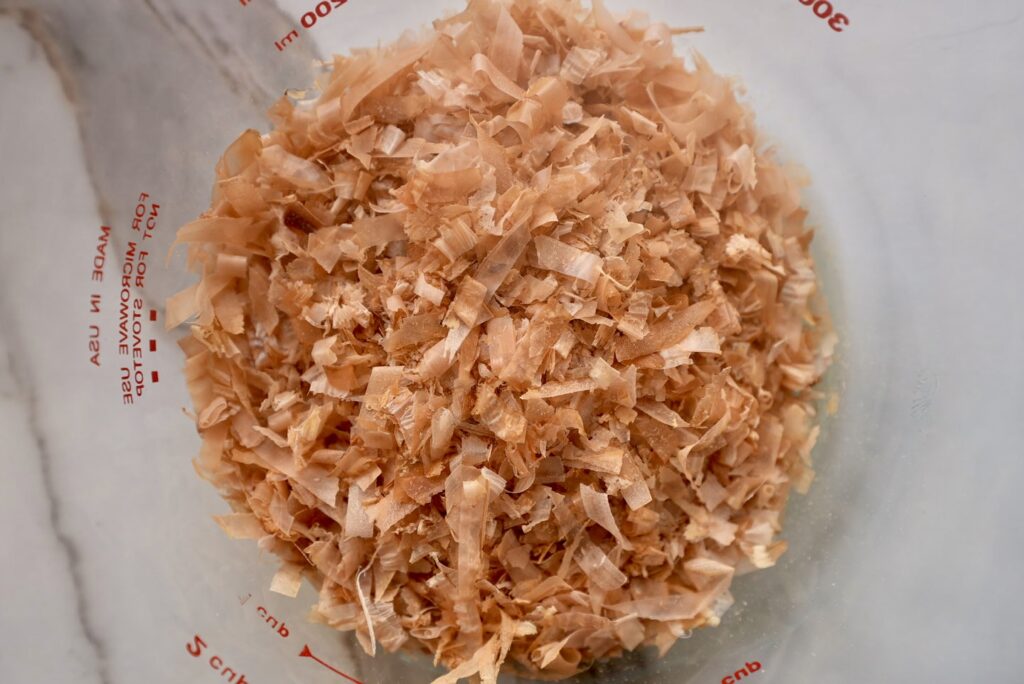
- Dashi from Scratch: Traditional dashi, made by simmering kombu (dried kelp) and katsuobushi (dried bonito flakes), is considered the best method. Soak the kombu in water, heat just below boiling, and add katsuobushi. This method is ideal for dishes with the purest flavor.
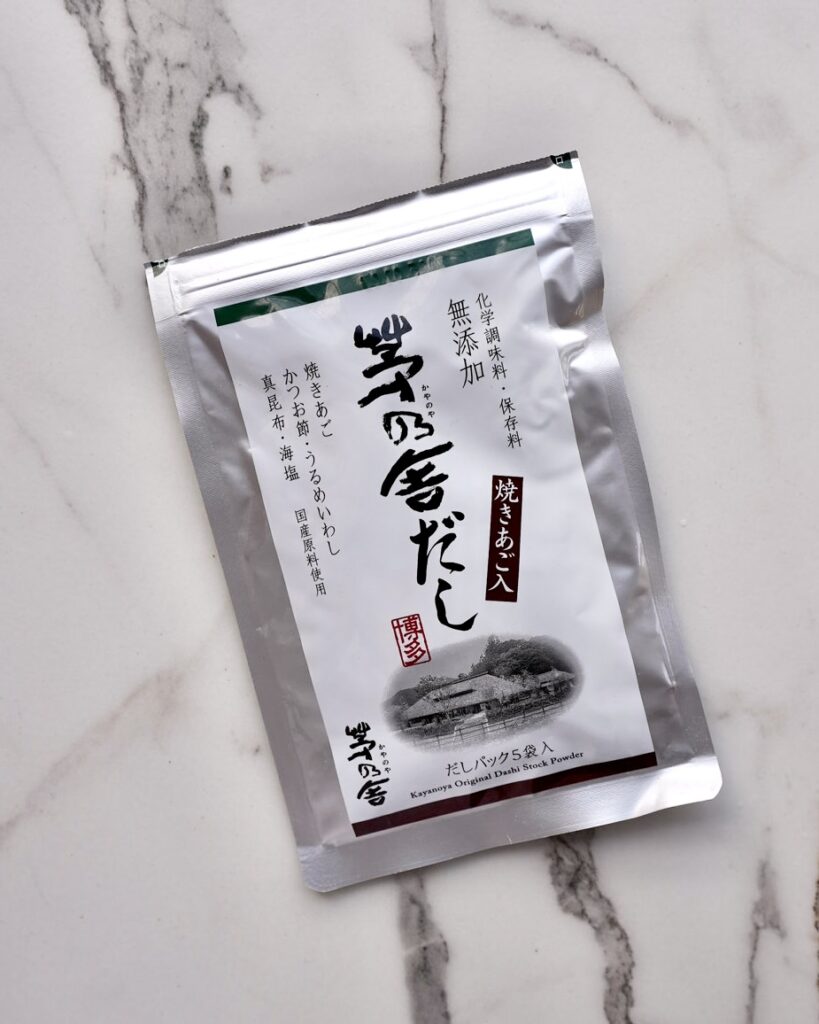
- Dashi Packets: Dashi packets, resembling tea bags, contain dried kombu, katsuobushi, and sometimes shiitake mushrooms or dried sardines. Just simmer the packet in water for a few minutes for a quick and flavorful broth. Buy dashi packets here from one of my most recommended dashi brands, Kayanoya.
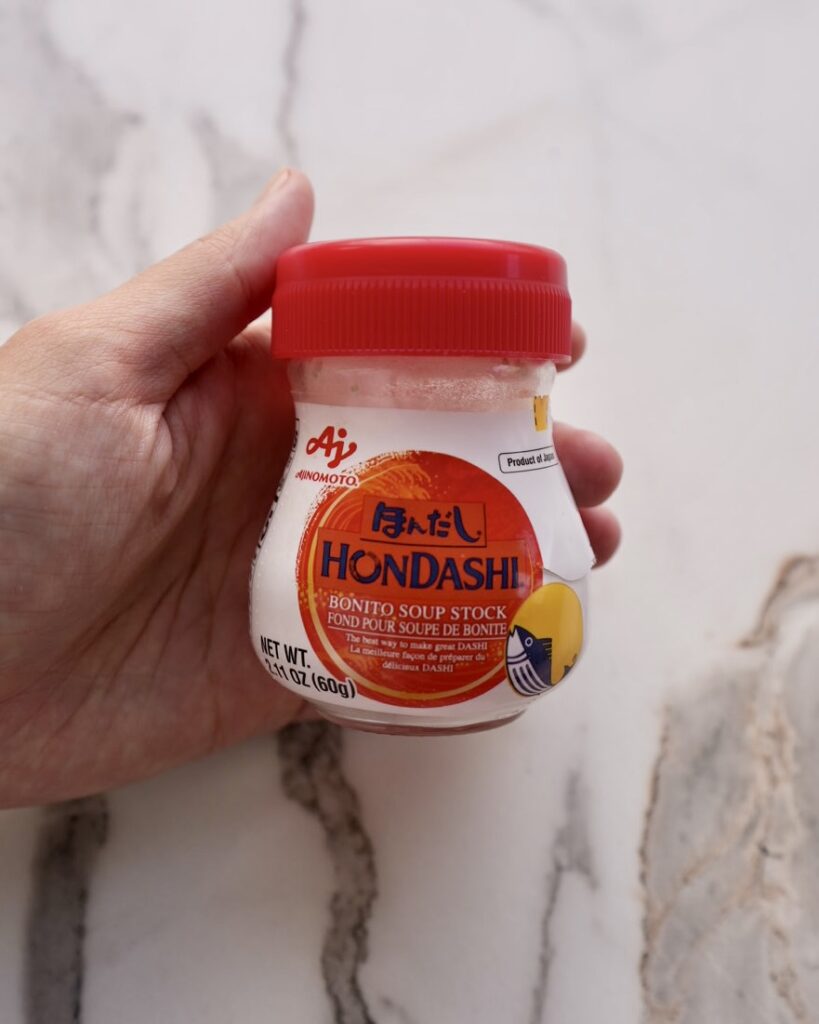
- Instant Dashi (Hondashi): Instant dashi, often called hondashi, is a granulated or powdered form of dashi. Just a spoonful dissolved in hot water creates a quick and flavorful stock. This option is convenient and ideal for busy days. Buy hondashi here.
Making Dashi From Scratch
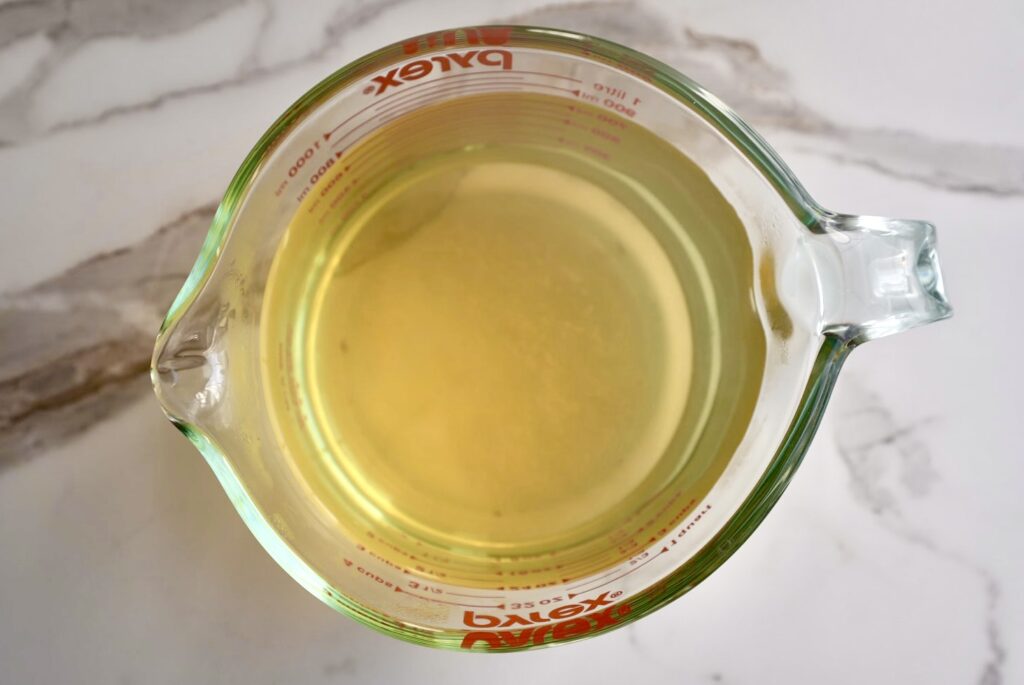
Dashi is a fundamental Japanese stock that forms the backbone of countless dishes. It provides a delicate yet deeply savory flavor known as umami.
Made traditionally from kombu (dried kelp) and katsuobushi (dried bonito flakes), dashi is prized for its ability to enhance other ingredients without overpowering them. It’s used in a wide variety of dishes, from miso soup and noodle broths to simmered vegetables, nimono, and even sauces and dressings, making it an essential component of authentic Japanese cooking.
Like I mentioned above, you can use shortcuts to make dashi (which I do all the time! Making it from scratch is a little more work than I am cut out for, especially on busy days). So here’s how to make it from scratch:
- Prepare Kombu: Soak the kombu in cold water.
- Heat the Water: Slowly bring the kombu water to just below a boil.
- Remove: Take out the kombu before the water boils to prevent bitterness.
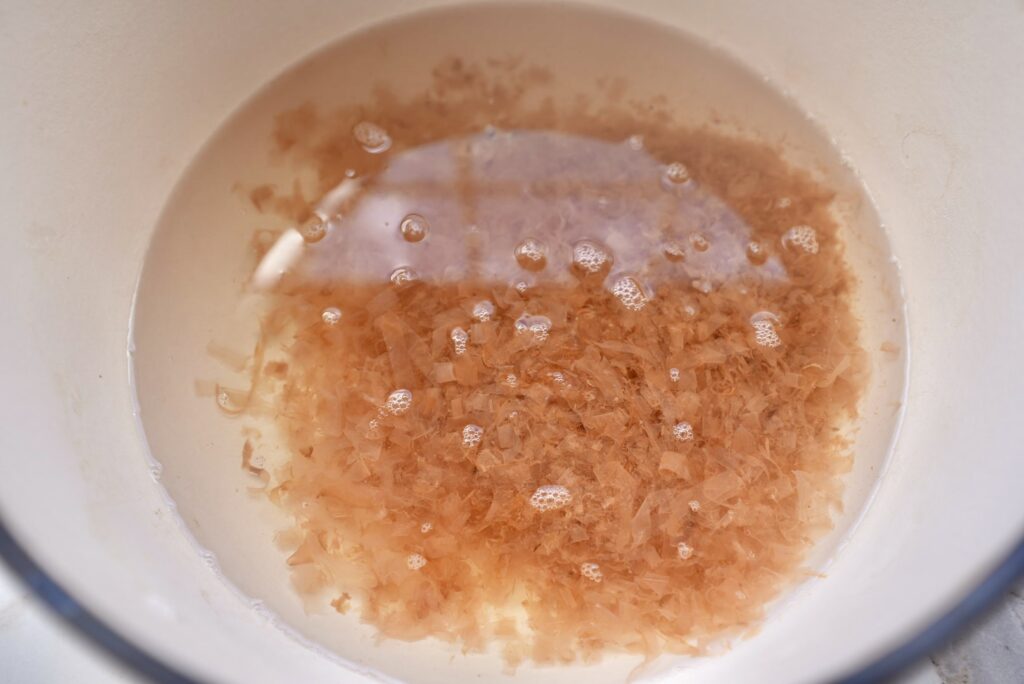
- Add Katsuobushi: Sprinkle in bonito flakes and let them steep for a few minutes.
- Strain: Remove the bonito flakes using a fine-mesh sieve.
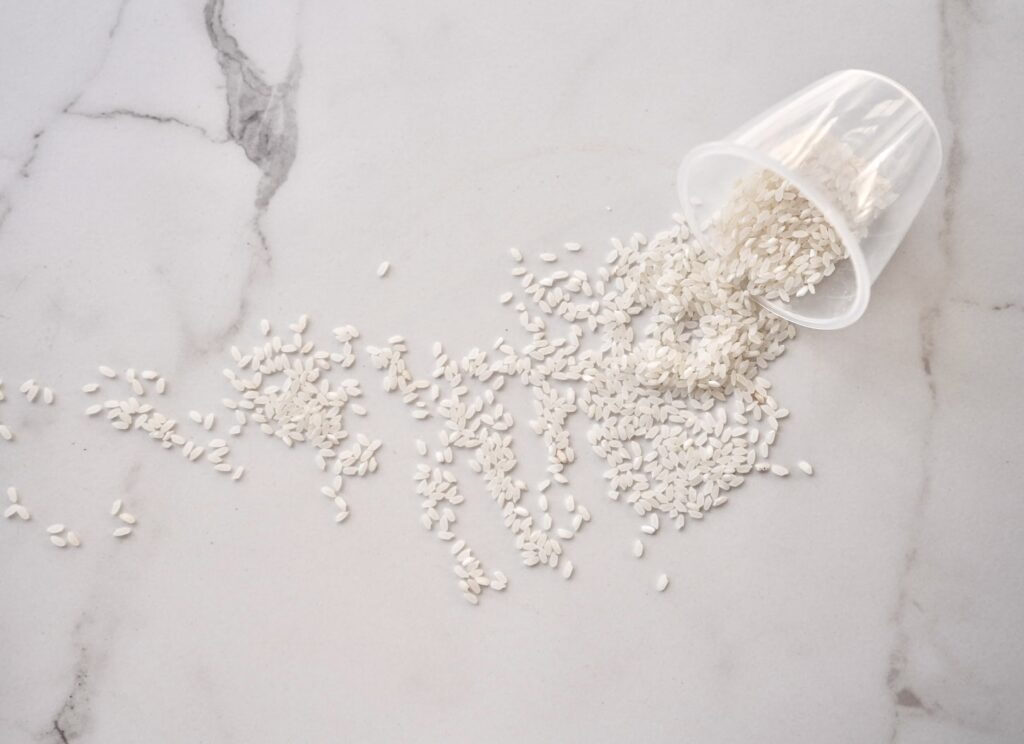
What Type of Rice to Use
Choosing the right type of rice can be confusing, especially with so many varieties available. In Korean and Japanese cooking, however, Japanese short-grain or medium-grain rice is almost always the go-to choice.
Short-grain rice, often labeled as sushi rice, is particularly prized for its soft and chewy texture, which pairs beautifully with traditional Japanese dishes. Medium-grain rice is a great alternative if short-grain isn’t available (I actually almost always use medium-grain myself because it’s generally cheaper where I live!). Both are ideal for recipes like this one, where the rice’s stickiness helps meld the flavors into every bite.
Recommended Rice Cookers
Do I need to have a fancy rice cooker? NO! Just like anything, generally, the higher the quality, the better. But you can make great rice in a cheap rice cooker, too!

5.5 cups or 10 cups
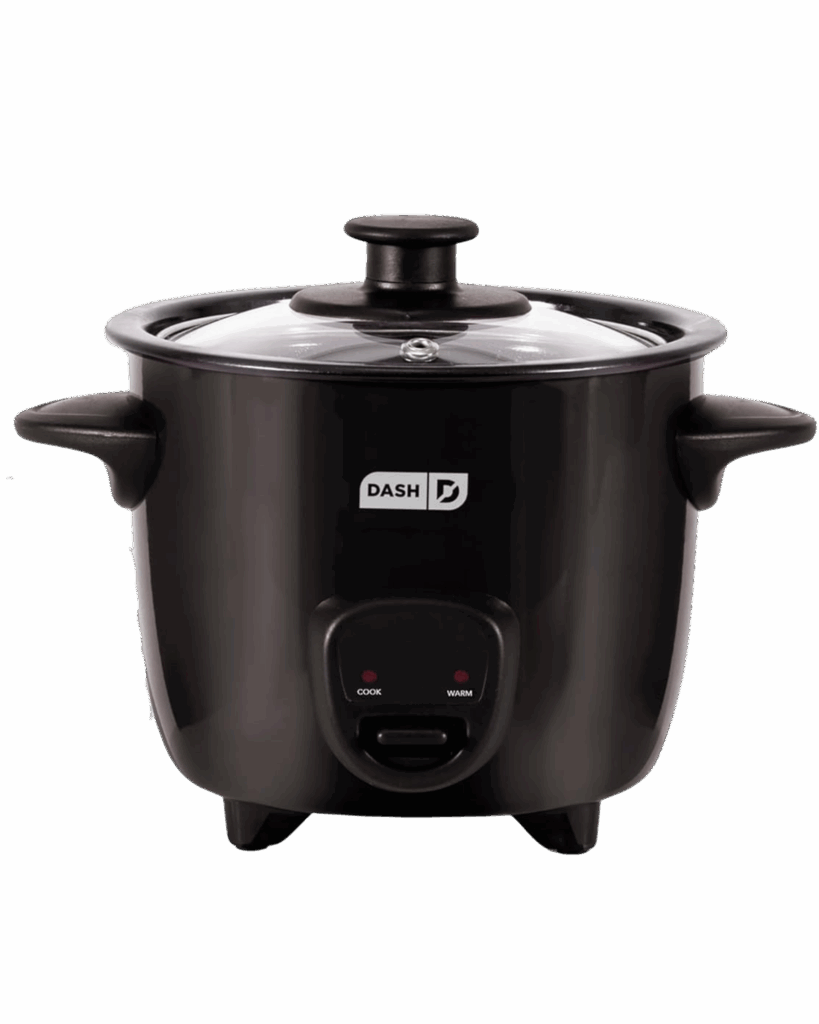
2 cups
Click the rice cooker photos to see my favorite rice cookers. I included a budget-friendly rice cooker I love! I use the Tiger 5.5-cup model shown. About 1/2 cup of Japanese short- or medium-grain rice makes 1 serving.
Key Features to Look For in a Rice Cooker:
- Timer and Keep Warm Function: Useful for planning meals ahead of time and keeping them warm until you’re ready to eat.
- Steaming Basket or Tray: Allows you to steam vegetables or cook other ingredients while the rice cooks.
- Multiple Cooking Functions: Ensure it has settings for steaming, slow cooking, and possibly even baking.
- Non-Stick Inner Pot: Makes cleaning easier and prevents sticking.
Enoki Beef Rolls
- Total Time: 25 minutes
Description
Tender beef-wrapped enoki mushrooms are simmered over sweet onions and finished with silky eggs for a comforting, protein-packed meal inspired by Japanese home cooking.
Ingredients
- 1/2 lb thinly sliced beef (~20 slices)
- 75 g enoki mushrooms (3 oz)
- 1/2 large yellow onion, thinly sliced
- 1/4 tsp black pepper
- 1/2 tbsp ginger, grated
- 3 eggs, beaten
- 3 tbsp soy sauce
- 2/3 cup dashi (or 1 tbsp hondashi + 3/4 cup water)
- 2 tbsp mirin
- 1 tsp granulated sugar
- Chopped green onions, for garnish (optional)
- 2 servings Japanese short-grain or medium-grain rice, cooked
Instructions
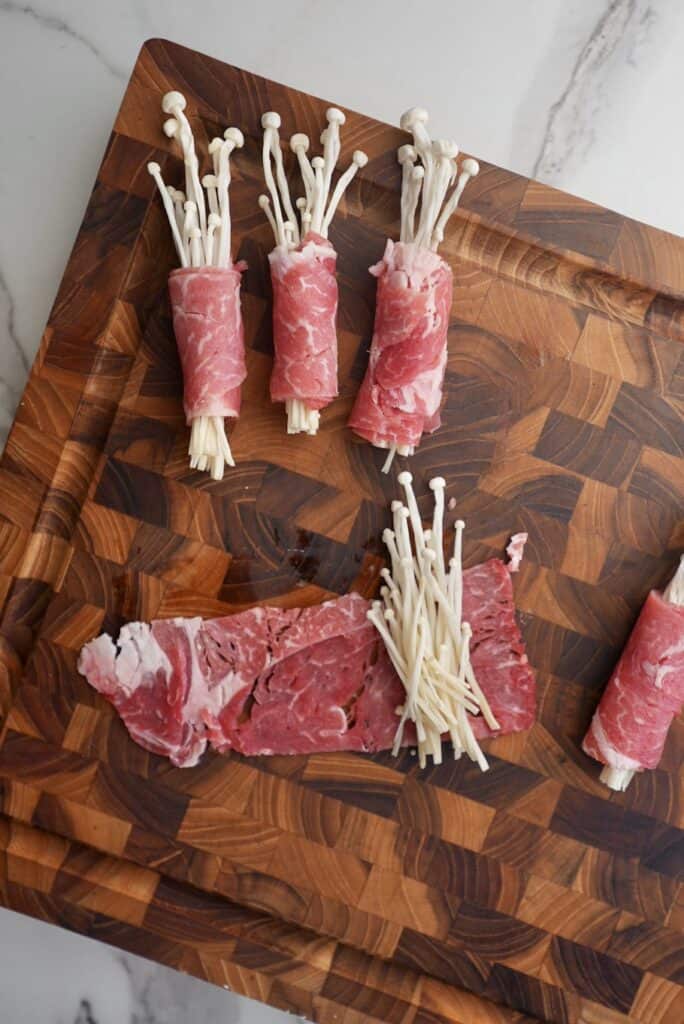
- Trim the root end off the enoki mushrooms and separate them into small bundles about ½ inch thick.
- Take one slice of beef and tightly wrap it around each small bundle, rolling from one end to the other so the beef holds the enoki together like a small log. Repeat until all beef and mushrooms are used.
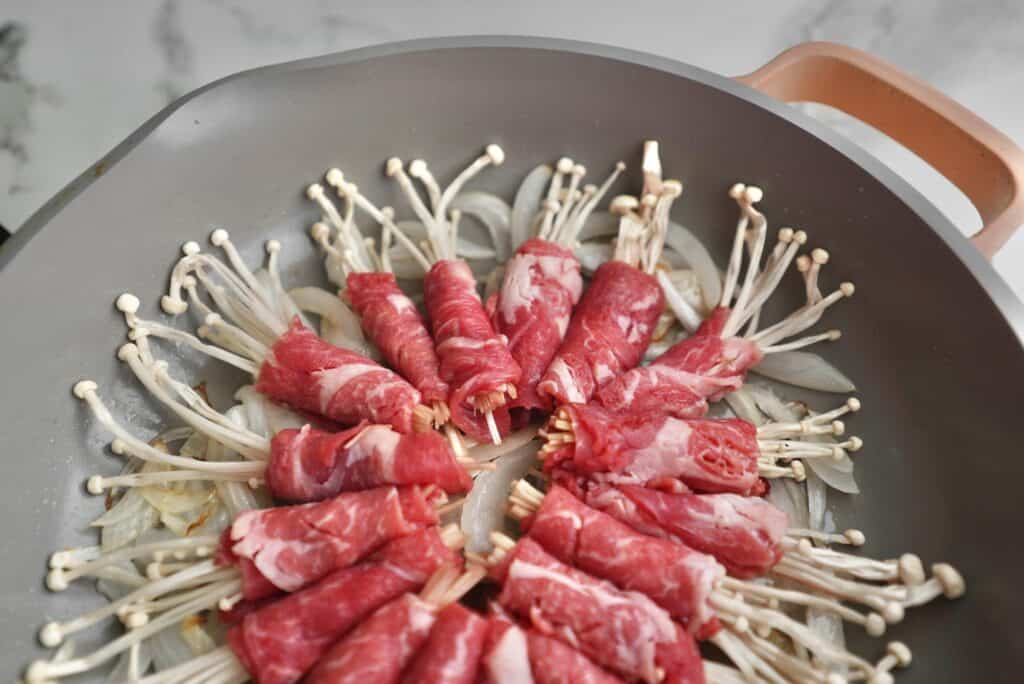
- In a medium pan over medium heat, add a small splash of oil and sauté the sliced onions for about 5 minutes until softened and slightly sweet.
- Reduce heat to medium-low and place the enoki-wrapped beef rolls over the onions.
- Pour in dashi, soy sauce, mirin, and sugar directly into the pan. Bring to a gentle simmer.
- Let the beef rolls cook for about 1 minute until they start to turn just opaque and absorb the broth.
- Pour the beaten eggs evenly over everything. Cover with a lid and cook for 2 – 3 minutes, depending on desired doneness (runny to softly set).
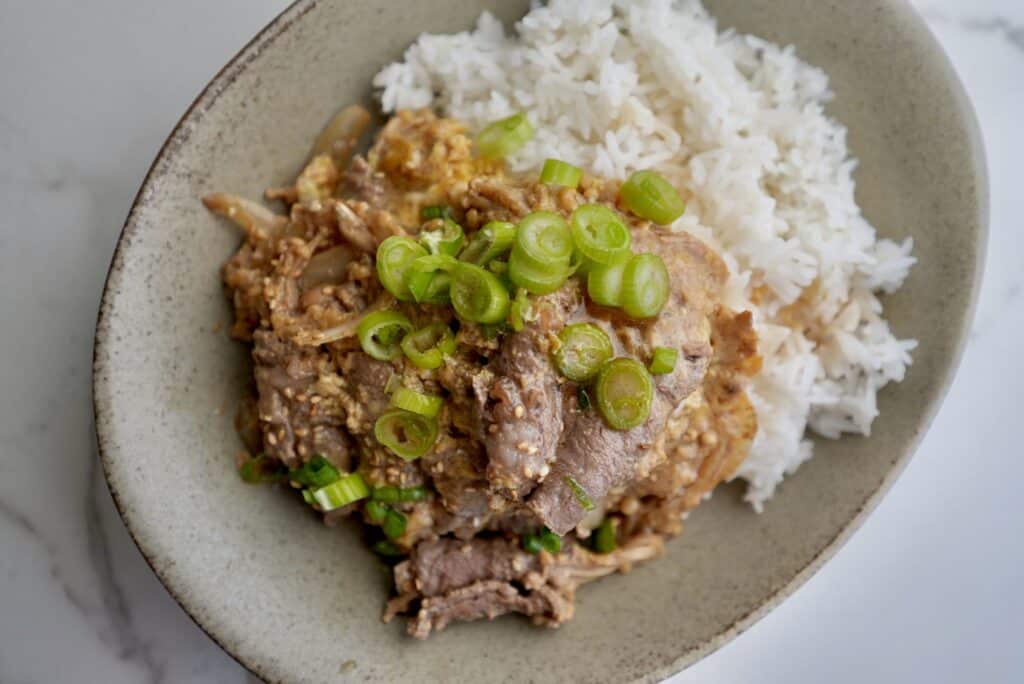
- Spoon over hot rice and top with green onions if using.
- Prep Time: 15 minutes
- Cook Time: 10 minutes
Nutrition
- Serving Size: 2-3


0 Comments