Hey all! Real Farmer Jeff here.
If you’re looking for a simple, low-cost way to improve your garden’s soil, biochar may be your answer.
Biochar is added to soil to improve its physical and biological properties. Unlike compost or fertilizers, it does not feed plants directly. When made and used correctly, biochar improves soil structure, increases nutrient retention, and supports beneficial microbes for years, sometimes decades.
In this blog post, I will cover what biochar is, how it differs from wood ash, whether gardeners make or buy it, and how to make and charge your own biochar for your garden.
What Is Biochar?
First thing’s first, biochar is a soil amendment, not a fertilizer.
Biochar is charcoal made for soil, produced by heating organic material in a low oxygen environment through pyrolysis. This creates a stable, porous carbon structure.
Unlike compost, which breaks down quickly, biochar is very stable. Its strong carbon structure resists breaking down, allowing it to remain effective for decades. In the garden, this means it continues improving soil long after other amendments have decomposed.
Think of biochar as:
- A soil sponge for nutrients and water, helping to keep them available to plants
- A microbial apartment complex, providing safe spaces for beneficial bacteria and fungi
- A carbon vault in your soil, contributing to long-term soil health and carbon sequestration
Biochar is most useful in soils that…
- Are sandy and drain quickly, losing nutrients easily
- Are clay-heavy or compacted, making root growth difficult
- Have low organic matter and poor microbial activity
- Show nutrient leaching, such as yellowing leaves or slow growth
Here’s a good rule of thumb for a 4 by 6 foot raised bed:
- Start with 1 to 3 pounds of biochar
- Mix thoroughly into the top 6 to 8 inches of soil to ensure even distribution
- Begin with smaller amounts and monitor plant response; biochar is long-lasting, so additions can be made over time
Biochar vs. Ash
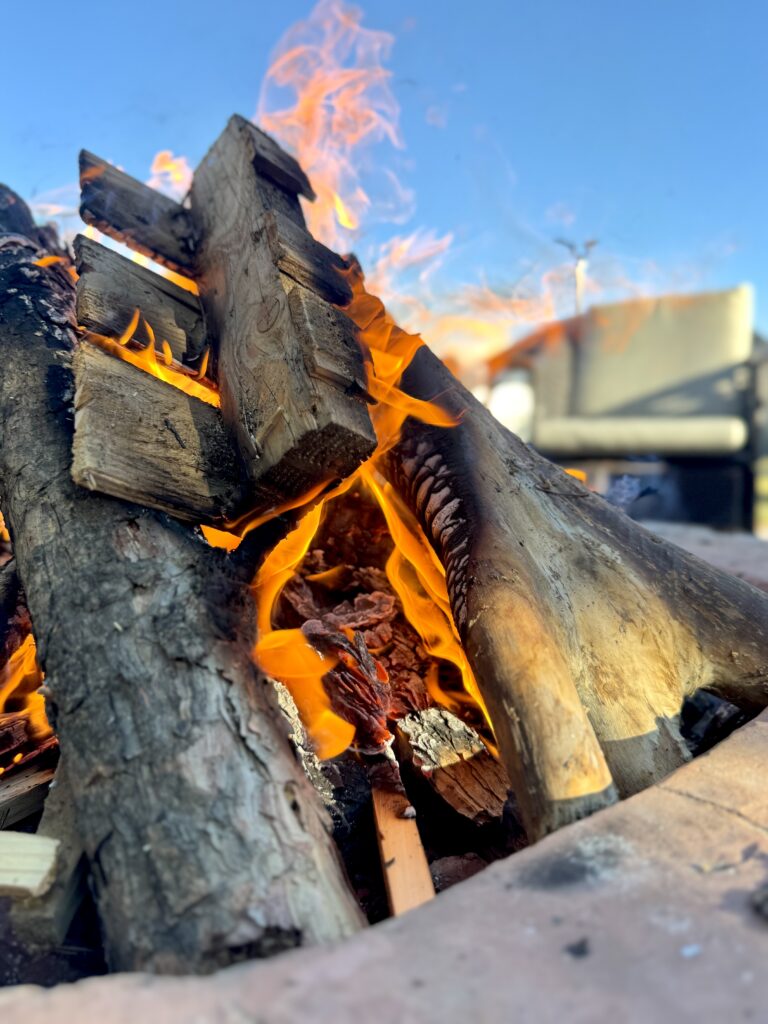
When making biochar, I’ve learned that the intensity of the fire matters far less than oxygen exposure and timing. It’s important to get this right! Large flames do not automatically mean failure. They are often just volatile gases burning off above the pile. Biochar is preserved carbon. It’s lost only when the char itself is exposed to oxygen, begins to glow, burn, and eventually turn to ash.
Understanding the difference between the three outcomes (biochar, burning charcoal, and ash) is key for producing soil-beneficial biochar. Here’s a chart I created that helps differentiate between them:
| Material | Appearance | Garden Benefit |
|---|---|---|
| Biochar | Black, intact wood; flames above the pile only; not glowing inside. Lightweight, porous, stable | Retains nutrients & water, supports microbes, improves soil, works well with compost and organic fertilizers. Its benefits last beyond a single season! |
| Burning Charcoal | Char glowing red or orange; oxygen reaching the material. Denser, less porous, begins to crumble | Holds fewer nutrients, fewer pores for microbes, breaks down faster |
| Ash | Gray or white; powdery and fragile. Fully oxidized carbon, quickly dissolves. | Minimal to none. It raises soil pH aggressively, and can damage microbes! |
So how do you tell if you’re making biochar, charcoal, or ash? Here’s another chart to help you out:
| Process | Indicators |
|---|---|
| Making Biochar | Material is black but not glowing; flames are above the pile, not inside; wood retains its structure and shape |
| Burning Charcoal | Char itself is glowing red or orange; oxygen has reached the char layer; material begins collapsing into ash |
| Ash Formation | Char continues burning unchecked; pile is left glowing with airflow until fully oxidized |
Do Most Gardeners Make or Buy Biochar?
In short, both… but buying is more common! I personally prefer to make my own. Many gardeners start by buying to experiment, then switch to DIY once they are comfortable with the process.
| Option | Pros | Cons |
|---|---|---|
| Buying Biochar | Consistent quality; sometimes pre-charged; very convenient | Expensive; often shipped long distances; feedstock may be unknown |
| DIY Biochar | Low cost; uses yard waste; full control over materials; lower carbon footprint | Requires attention; learning curve; safety precautions needed |
Note: Biochar Is Not a Fertilizer!
Fertilizers supply nutrients plants can immediately use. Biochar contains few nutrients but improves soil environment. Its porous structure retains nutrients, reduces leaching, and provides habitat for beneficial microbes. Once charged, biochar stores nutrients long-term but does not provide them directly. This is why it complements fertilizers rather than replacing them.
I’ll dive more into how you can charge your biochar below.
Main Benefits of Biochar
1. Nutrient Retention
Biochar’s porous structure captures nutrients such as nitrogen, potassium, and micronutrients that would otherwise leach away. Over time, this helps maintain a more balanced soil nutrient profile and reduces the frequency of fertilizer application.
2. Improved Soil Structure
Biochar can improve soil texture in multiple ways:
- Loosens heavy clay, making it easier for roots to penetrate
- Adds structure to sandy soils, improving water and nutrient retention
- Enhances aeration and drainage, reducing waterlogging and compaction
3. Microbial Habitat
Biochar provides a long-lasting shelter for beneficial soil organisms:
- Bacteria that assist in nutrient cycling
- Mycorrhizal fungi that help roots access nutrients and water
- Microbes from compost or vermicompost that support healthy plant growth
4. Water Holding Capacity
Adding biochar increases the soil’s ability to hold water, especially in sandy soils. This can reduce the frequency of irrigation and help plants survive short dry periods.
5. Carbon Sequestration
Biochar locks carbon into the soil instead of releasing it as CO₂, contributing to climate-positive gardening practices while simultaneously improving soil health.
How to Make Biochar
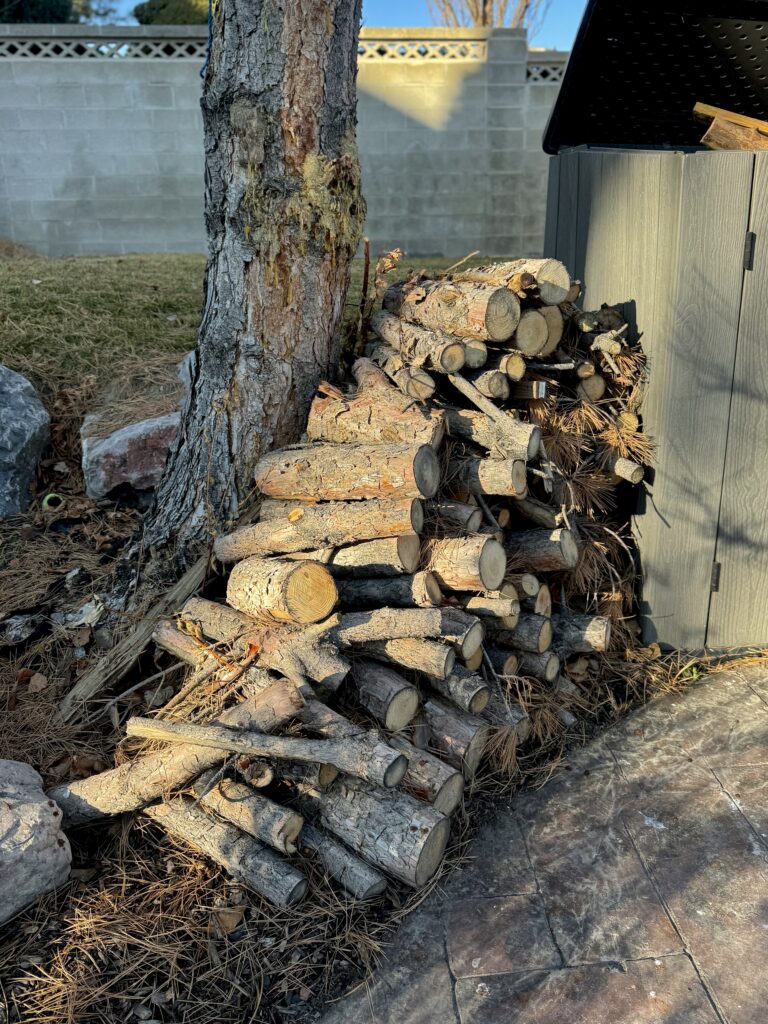
You’ll need:
- Metal burn barrel or shallow pit
- Dry wood
- Water source
- Shovel
1. Build a Fire
Start a small fire with small sticks to create a hot base.
2. Gradually Add Wood
Add larger wood pieces gradually to maintain consistent charring without flames getting out of control.
3. Limit Oxygen Flow
Control oxygen by limiting airflow; the goal is charring, not full combustion. To control the oxygen, remember these tips:
- Add fresh wood on top of the burning pile. This shields the char below from oxygen while gases burn above.
- Once fully charred, stop the burn with water, soil, or a lid to preserve the carbon structure.
- Stop the burn when the wood is fully black and intact and flames are still present above the pile. Waiting until flames die down risks turning biochar into burning charcoal or ash.
4. Check for Blackening
Monitor the wood for blackening and surface cracking; this indicates proper charring. One of the most important parts of making biochar is controlling the burn so the material chars instead of turning completely into ash. Here’s some pointers to avoid that!:
- Add wood slowly to avoid overheating
- Stay nearby to monitor the fire
- Quench early rather than later to prevent complete combustion
- Black, charred wood is the goal; gray or powdery ash indicates too far

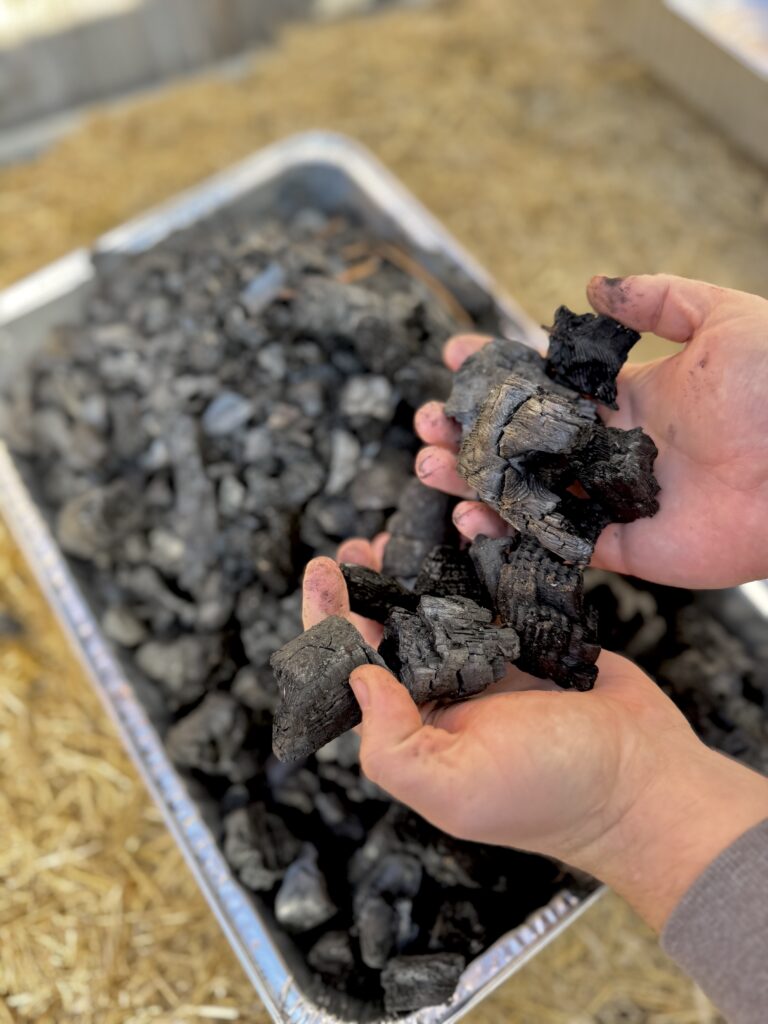
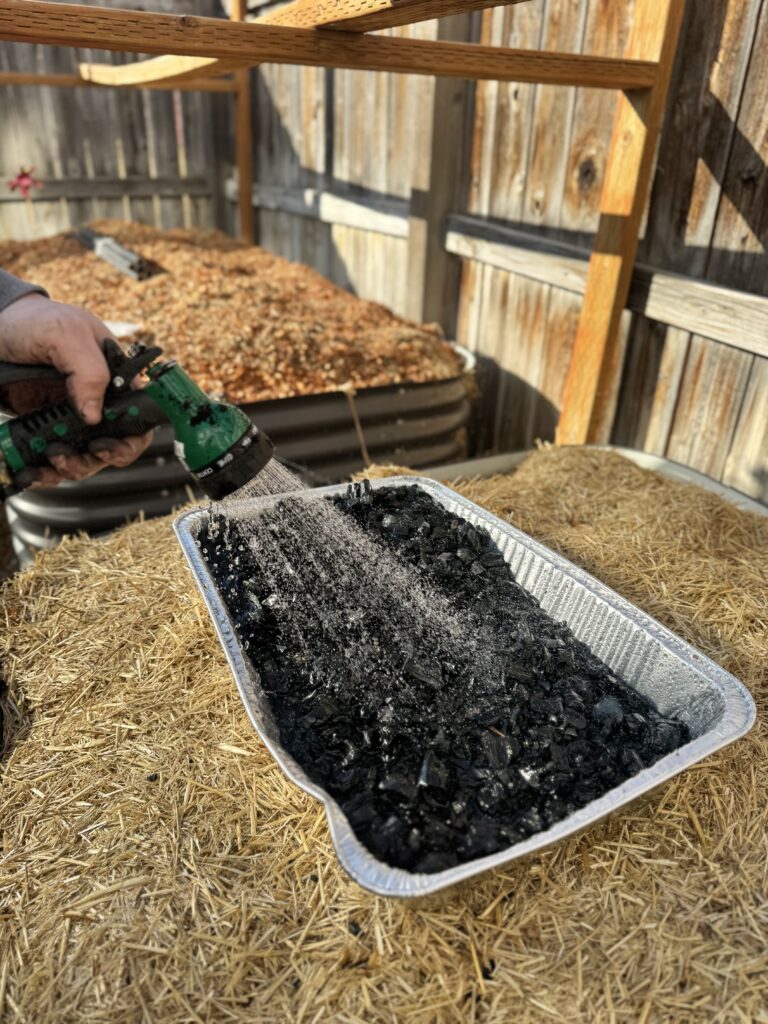
5. Quench and Crush
Quench the fire with water or cover with soil to stop further burning. Dry thoroughly and crush the biochar into pea-sized pieces for even mixing into soil. After the burn, be sure to check your biochar!:
- Float test: Often floats or bobs in water
- Color: Black all the way through, not gray or white
- Weight and texture: Lightweight, porous, snaps cleanly
- Residue test: Leaves black residue, not chalky gray
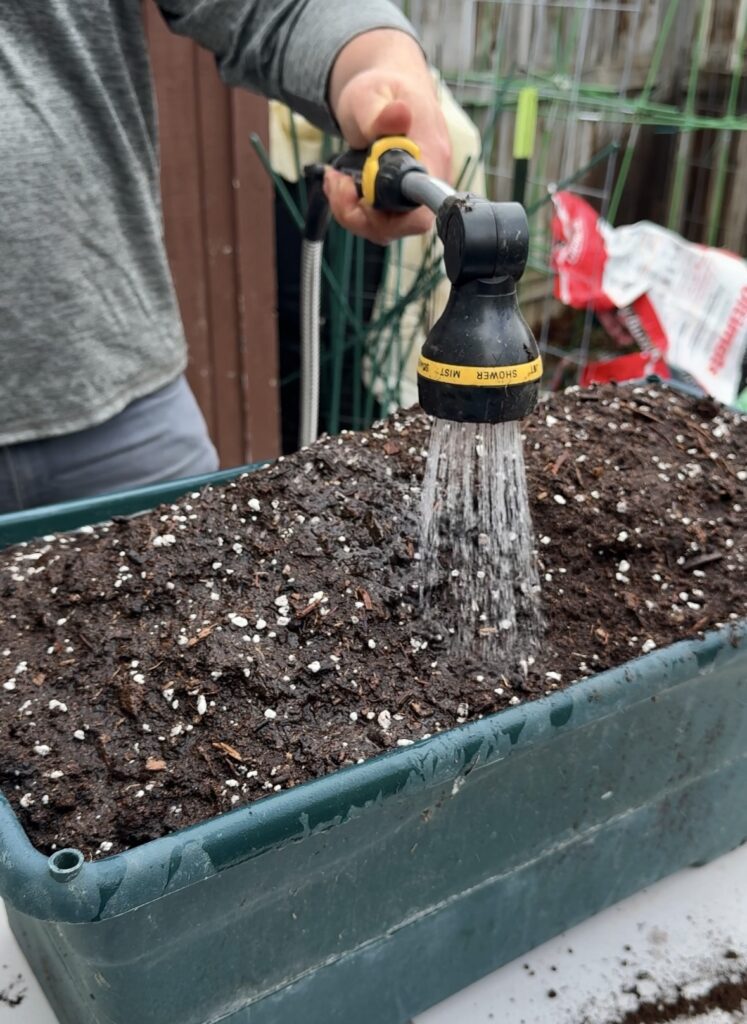
6. Charge the Biochar
To charge the biochar, soak, I suggest reading the next sections that will include various ways to do that. I prefer to place it in diluted fish fertilizer before adding it to your garden soil. Why “charge the biochar”?: Raw biochar is like an empty sponge. Added directly to soil, it can temporarily steal nutrients, particularly nitrogen, slowing plant growth. Charging fills its pores before soil application. Again, I dive deeper into this in the next sections.
Lastly, here are some common mistakes to avoid when making your own biochar!
- Burning down to ash: Letting the fire continue until fully oxidized
- Introducing oxygen late: Stirring or spreading material during the burn
- Quenching too late: Waiting too long to stop the burn
- Assuming flames mean failure: Large flames are often just volatile gases
- Using contaminated wood: Painted, treated, or glued wood
- Skipping charging: Fresh biochar should be charged before soil use
| Best Biochar Bases: | What to Avoid: |
|---|---|
| Hardwood (oak, maple) | Treated, painted, or glued wood |
| Fruit tree prunings | Plywood or MDF |
| Dry branches and sticks | Wet or green wood (produces more smoke, less char) |
| Corn cobs or nut shells |
Raw vs. Pre-Charged Biochar
Raw biochar can temporarily soak up nutrients, especially nitrogen, if not charged, which may reduce plant growth initially. Many commercial biochars are not pre-charged, so it’s super important to make sure you charge them yourself with compost, manure, or liquid nutrients! Don’t forget this step!
Additionally, biochar is different from wood chips in that it doesn’t decompose, thus it does not consume nitrogen. Once charged, it retains nutrients and water efficiently. Just make sure to mix it gradually with fertilizer for even distribution, and treat it as a long-term soil enhancer, not a fertilizer replacement!
Best Ways to Charge Biochar
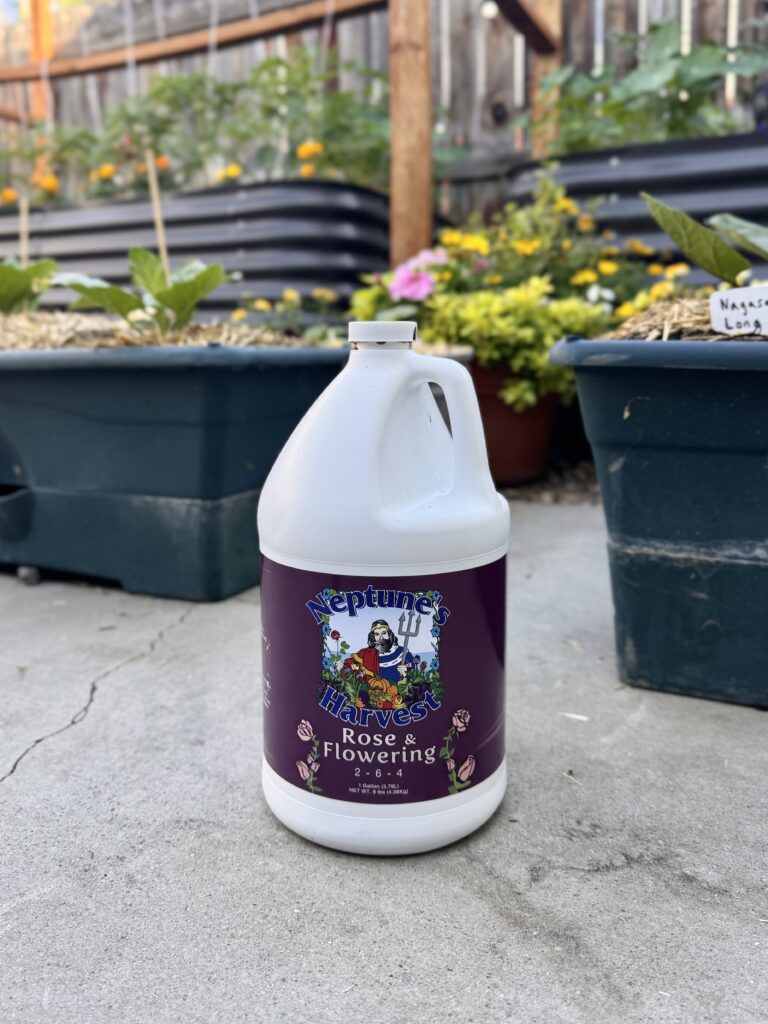
- Liquid Nutrient Soak: My preferred method! Soak biochar for 24 – 72 hours in compost tea or diluted manure tea. Some sources mention using urine, which is a more unusual method but effective for nitrogen-rich charging. A more common (and accessible!) approach is using liquid fish fertilizer. I’ve linked the one I love here. Soak the biochar in liquid fish fertilizer for 24 – 48 hours to allow it to absorb nutrients, then mix it into soil. This method is quick, provides immediate nutrient loading, and supports microbial activity.
- Compost Charging: Mix biochar into active compost for 2 – 4 weeks to allow microbes to populate the pores.
- Worm Bin Charging: Add small amounts to vermicompost, promoting microbial diversity and nutrient retention
- Soil + Fertilizer Pre-Mix: Mix biochar with garden soil and an organic fertilizer for 1 – 2 weeks before use.
How Much Biochar Should I Use?
Determining the right amount of biochar to use is key to improving your soil without overwhelming it. Here’s what I recommend:
- Use 5 to 10% by volume in garden beds
- 1 to 2 cups per planting hole
- Start light, observe plant response, and adjust gradually
Varying Quality Levels of Biochar
Even when quenched before it turns to ash, biochar can vary in effectiveness depending on temperature, oxygen exposure, and feedstock. Here’s how each can effect the quality of your biochar:
- Temperature: Lower-temperature burns (around 350–550°C) produce highly porous biochar ideal for nutrient and water retention. Higher-temperature burns (600–900°C) produce harder, denser carbon that is less porous and slightly less effective for soil.
- Oxygen Exposure: Even if quenched before ash, too much oxygen during the burn can partially oxidize the char, lowering porosity and soil benefits.
- Feedstock Type: Hardwoods, softwoods, and crop residues all produce different pore structures, densities, and nutrient-holding capacities.
| Quality Level | How it Looks and Feels | Soil Performance |
|---|---|---|
| High-quality biochar | Fully black, lightweight, porous, intact structure | Excellent nutrient and water retention, great microbial habitat, long-lasting in soil |
| Moderate biochar | Black with some denser or slightly oxidized sections | Beneficial, but slightly lower nutrient and water retention |
| Over-charred / hard charcoal | Very dark, brittle, shiny, low porosity | Limited benefit for soil, poor water and nutrient retention, breaks down faster |
| Ash | Gray or white, powdery | Minimal soil benefit, almost entirely oxidized carbon |
With just a little effort and some careful attention, making your own biochar can turn garden waste into a powerful soil booster. By adding this nutrient-rich, carbon-packed material to your garden, you’re not only improving plant growth but also contributing to a healthier, more sustainable environment. Best of luck! Be sure to drop a comment below if you have any questions on biochar.
Thanks for reading along, guys! If you enjoyed this, check out my other gardening blog posts:
- How to Start a Garden on a Budget for Under $100
- 4 Reasons Why Tomatoes Are the Best Vegetable to Grow
- My Garden Setup: 3 Best Garden Containers for Every Gardener
- When to Plant Indoors vs. Outdoors: A Seasonal Guide for Gardeners
- Essential and Nice-to-Have Garden Products for Your Perfect Setup
- Starting Seeds vs. Buying Transplants: How to Decide for Your Garden


0 Comments