Hey all! Real Farmer Jeff here.
Being a gardener, I am always looking for ways to preserve my harvest. I love growing cucumbers, but sometimes they go bad before I can even have a chance to figure out what to do with them. This is where pickling comes in handy!
Before vinegar was widely available, pickles were preserved through fermentation. Cucumbers were submerged in salted water where natural bacteria created lactic acid that preserved them. This method dates back over 4,000 years across Europe, the Middle East, and Asia. Vinegar pickles are a later shortcut, common only after industrial vinegar made quick pickling easy.
Pickles are among the most popular fermented foods worldwide. In this blog post, I’m going to dive into pickles and how you can make them at home. Let’s get started!
How Pickles Became So Popular
Pickles hit a rare culinary sweet spot by solving multiple problems at once. They allow surplus cucumbers to be preserved while delivering delicious flavors. Beyond taste, pickles have long been associated with digestive benefits. Not to mention their durability makes them easy to transport, trade, and enjoy long after they were made.
Immigrant communities brought fermented pickles to the U.S., where they became staples with sandwiches, burgers, and barbecue. Vinegar “quick” pickles eventually dominated shelves, but fermented pickles persisted.
Eventually, dill became the classic pickle herb. Historically, it was valued for its antimicrobial properties, digestive support, and grassy, citrusy flavor that balances lactic acidity. Eastern European fermenters paired dill seeds and flowering dill heads with cucumbers centuries ago.
Other Traditional Pickle Flavorings:
While dill dominates, other classic additions include:
- Garlic for nearly universal flavor
- Black peppercorns for subtle heat
- Mustard seed for earthy depth
- Coriander seed for citrus undertones
- Bay leaves for aroma and mild tannin contribution
- Horseradish root or leaves for heat and crispness
- Grape or oak leaves for natural tannins
Note: Using leaves or tea for tannins is completely optional. Bay leaves are very easy to find and provide a gentle tannin effect. They are milder than grape or oak leaves because they have lower tannin content and a subtler flavor impact, contributing aroma without adding bitterness.
Fermented Pickles vs. Vinegar Pickles
The way a pickle is preserved makes a big difference in what it offers nutritionally. Traditional pickle fermentation has declined because vinegar pickles are faster, more shelf-stable, and easier to produce consistently. True lacto-fermented pickles are uncommon in most average grocery stores and are usually found refrigerated, if available at all. Shelf-stable pickles are almost always vinegar-based.

That said, fermented pickles have a unique complexity that vinegar pickles simply can’t match. The flavors develop gradually during fermentation, resulting in a layered, savory profile and a more integrated saltiness. The texture is lively and crisp, giving a satisfying crunch with each bite. Below is a quick comparison between traditionally lacto-fermented pickles and vinegar pickles:
| Feature | Lacto-Fermented Pickles | Vinegar Pickles |
|---|---|---|
| Preservation Method: | Preserved by natural bacterial fermentation | Preserved by added vinegar, not fermentation |
| Ingredients: | Made with salt, water, and time | Made with vinegar, often with salt and sugar |
| Probiotics: | Contain live probiotics (if unpasteurized) | Do not contain live cultures |
| Heat: | Naturally fermented, not heat-treated | Unheated does not mean fermented |
| Gut Health: | Support gut health and microbiome diversity, live probiotic cultures, improved mineral absorption, lower glycemic impact | Do not provide probiotic benefits |
| Flavor: | Sourness develops gradually. Integrated saltiness with a lively, crisp texture | Immediate acidity with one-note sharpness. Often softened by heat processing |
| Nutrition: | Low calorie and flavorful | Still low calorie and flavorful |
Think of fermented pickles as wine, vinegar pickles as lemon juice. That said, fermented pickles are overall better for you when truly fermented and unpasteurized. Vinegar pickles lack live cultures unless fermented first and left unheated.
How to Make Lacto-Fermented Pickles
Ingredients:
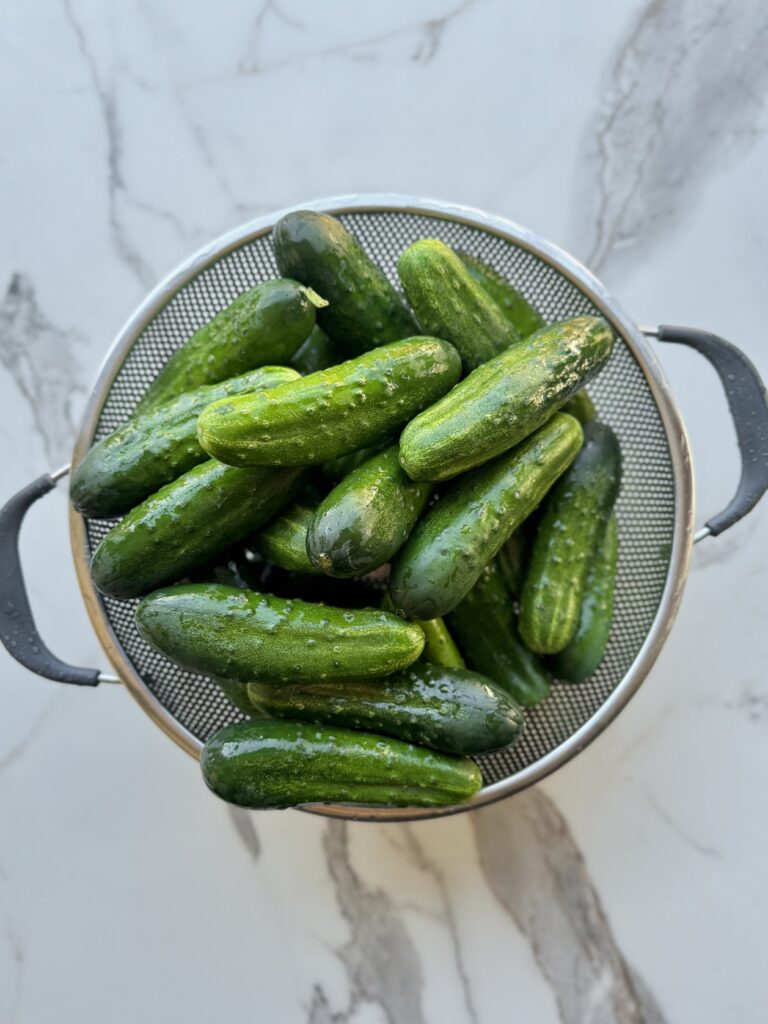
- Fresh cucumbers. Ideally a variety that’s meant for pickling – Kirby, Boston Pickling, and Calypso are most popular.
- Non-iodized salt
- Fresh dill (fronds + seed heads)
- Ideally you can use fully flowered dill for the taste and more rigid stalk that won’t break down when fermented. Dill seed can be great to approximate the taste of flowered dill since the seeds come from the flowers
- If not, fresh immature (non-flowered) dill will also work although the flavor will be less classic dill. However, it will still have hints of dill that taste good, but perhaps more grassy. Similarly, “dill weed” spice can be an alternative to immature, fresh dill.
- Garlic cloves (generally use about 1 clove for every 2 – 4 cucumbers depending on size)
- Optional spices (peppercorns, mustard seed, bay leaf, grape/oak/horseradish leaves, or black tea)
- Use about 1 tsp of peppercorn and mustard seed for each quart sized batch. Make sure to use whole peppercorns if applicable.
- I put some more info about the optional leaves below. These are added to help pickles stay crisp. 1-2 leaves per quart should be plenty!
Basic Brine Ratio
Use a 2 – 2.5% salt brine (and make sure to dissolve it completely):
- 1 tbsp fine sea salt per 2 cups water
- About 30 g salt per liter
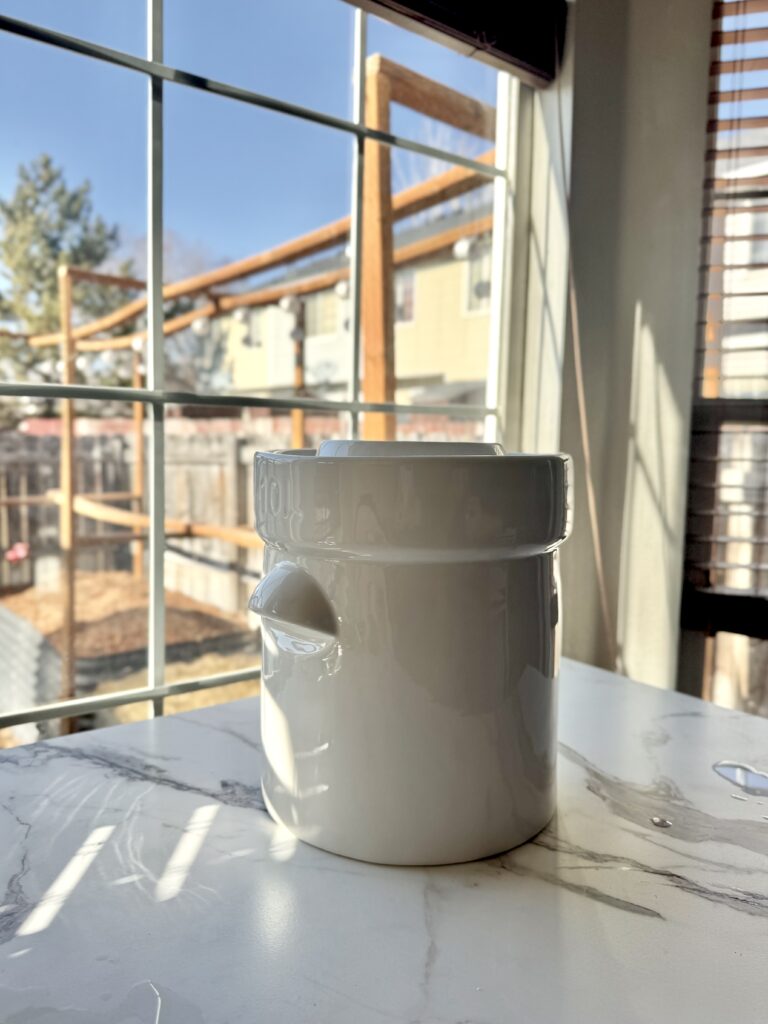
Equipment
- Glass jar or fermentation crock
- Fermentation weight (the fermentation crock I’ve linked comes with weights) or clean stone
- Loose lid or airlock (again, the fermentation crock has this)
Instructions
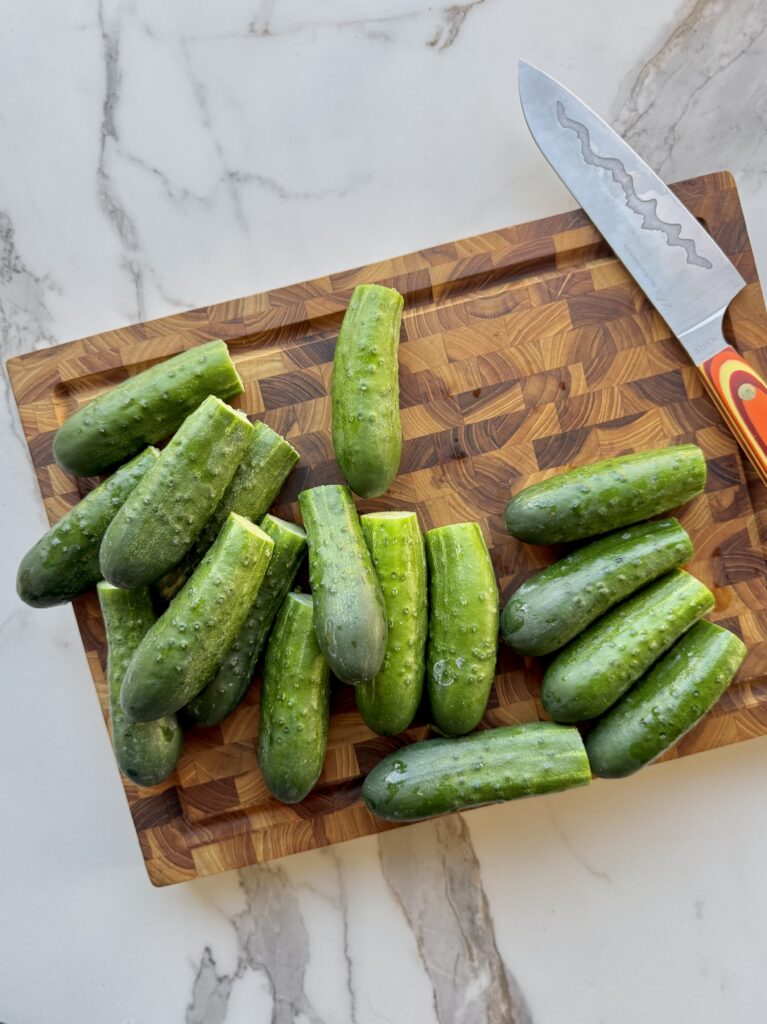
- Wash cucumbers thoroughly.
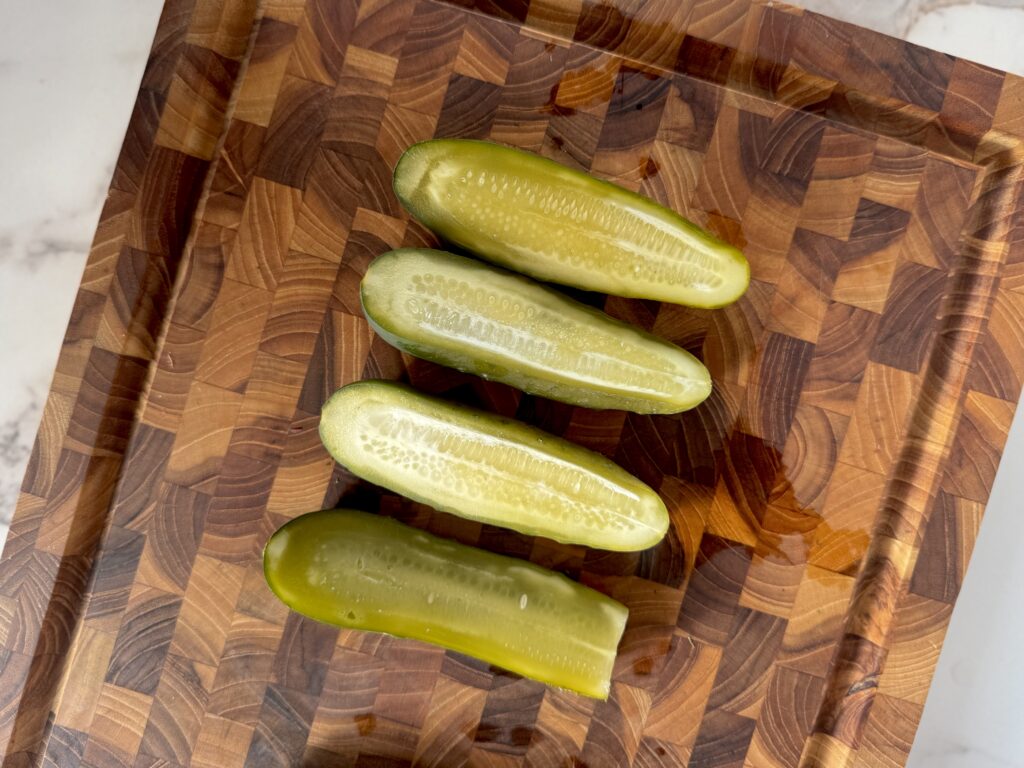
- Trim the blossom end (¼ inch). This will not affect the taste of the pickles and will decrease the chance of soft pickles (more on this below).
- Add garlic, dill, and optional spices to the jar. It works well to add half the spices to the bottom and then half the spices on top of the cucumbers.
- Keep the garlic whole or lightly crushed (especially for large garlic) to achieve best results.
- Large Flowering Dill Heads are Ideal for Pickles, but you can get away with using less mature dill sprigs if necessary (see ingredients section).
- If using tannin-containing leaves or tea, add them now so they are fully submerged before fermentation starts. Use 1 – 2 fresh grape, oak, or horseradish leaves per quart jar, or ½ tsp loose-leaf black tea.
- Pack cucumbers tightly.
- Add weights
- Pour brine to fully submerge cucumbers and leaves underneath the weights
- Cover loosely and ferment at room temperature (65 – 75°F). The longer you ferment, the more sour they will be! See the timeline I put below. I normally pickle for one week.
Fermentation Timeline
- 2 – 3 days: mildly sour (half-sour)
- 5 – 7 days: classic sour
- 10 – 21 days: fully sour
Tips to Achieve Crispy Pickles
- Trim the blossom-end to reduce enzymes that soften pickles (safe if submerged) – see photo above
- Do not poke holes, as this encourages softening
- Choose the right cucumbers (Kirby, Boston Pickling, National Pickling, Persian)
- Choose a cucumber size 3 – 5 inches; smaller cucumbers stay crisper
- Use tannins if desired, adding them at the start with cucumbers so they are submerged: grape leaves, oak leaves, horseradish leaves, loose-leaf black tea (½ tsp), or bay leaves for a milder effect
- Keep cold: refrigerate to slow fermentation and lock in crunch
Tip on Tannins:
Fresh leaves (grape, oak, horseradish) are generally preferable because they provide a natural, mild tannin effect without adding extra flavoring. Black tea is also effective but stronger; use it sparingly (½ tsp per quart jar) to avoid overpowering flavor. Bay leaves are mild and convenient but contribute the least tannin effect. All tannin methods are optional; the choice depends on availability and how firm you want your pickles.
Taste regularly and move to the refrigerator once desired sourness is reached.
How to Source Oak, Horseradish & Grape Leaves:
- Oak leaves: Provide tannins to help pickles stay firm; source from yards, parks, or friends; fresh or dried
- Horseradish leaves: Tannins and subtle peppery aroma; source from growers or gardens; fresh preferred, dried okay
- Grape leaves: Often available fresh from farmers markets, home gardens, or Middle Eastern grocery stores; they can also be used jarred or preserved
- Bay leaves: Mild tannin contribution, widely available, gentle effect on texture and flavor
- Black tea: Use loose leaf for best effect; ½ tsp per quart jar
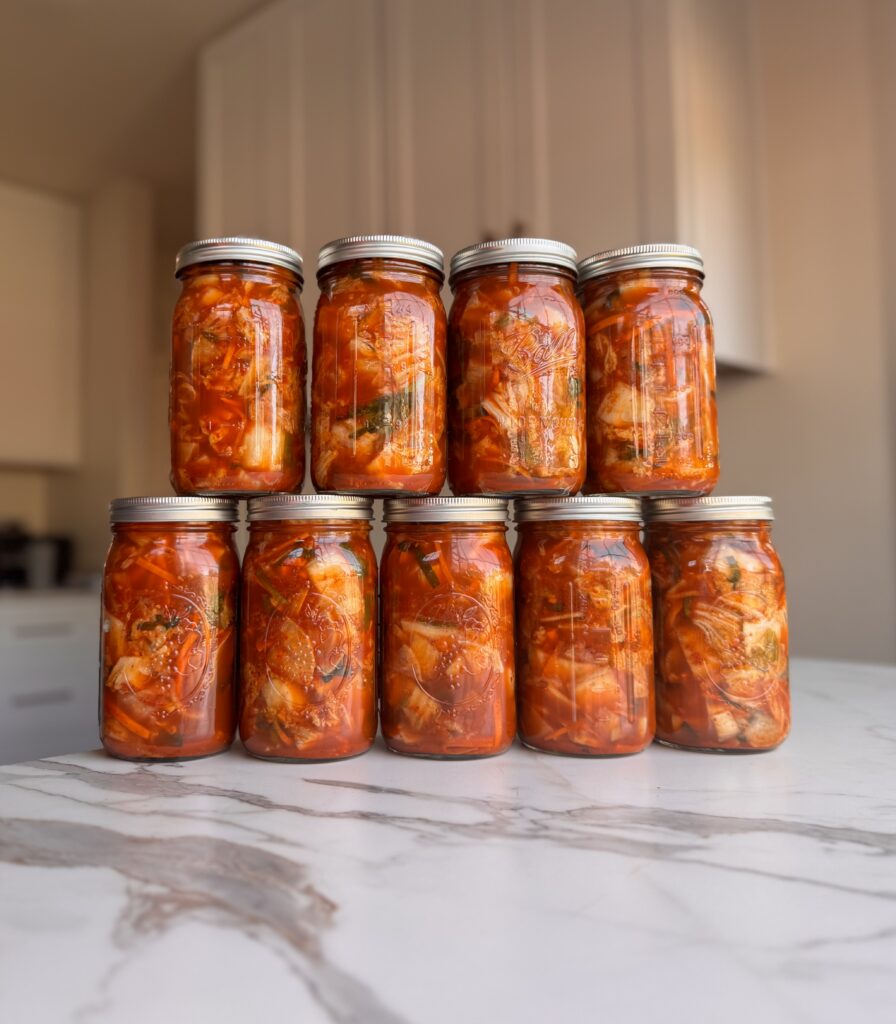
Enjoy fermented foods?
Try my homemade kimchi recipe!
Thanks for reading along, guys! If you enjoyed this, check out my other gardening blog posts:
- How to Start a Garden on a Budget for Under $100
- 4 Reasons Why Tomatoes Are the Best Vegetable to Grow
- My Garden Setup: 3 Best Garden Containers for Every Gardener
- When to Plant Indoors vs. Outdoors: A Seasonal Guide for Gardeners
- Essential and Nice-to-Have Garden Products for Your Perfect Setup
- Starting Seeds vs. Buying Transplants: How to Decide for Your Garden


0 Comments