Hey all! Real Farmer Jeff here.
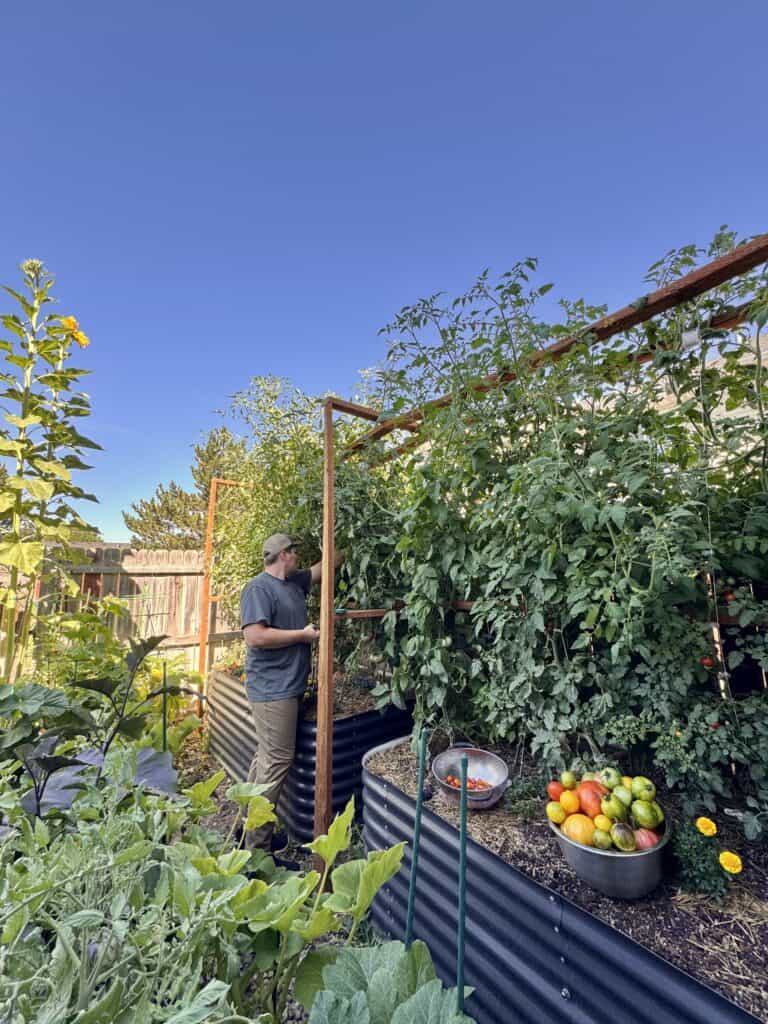
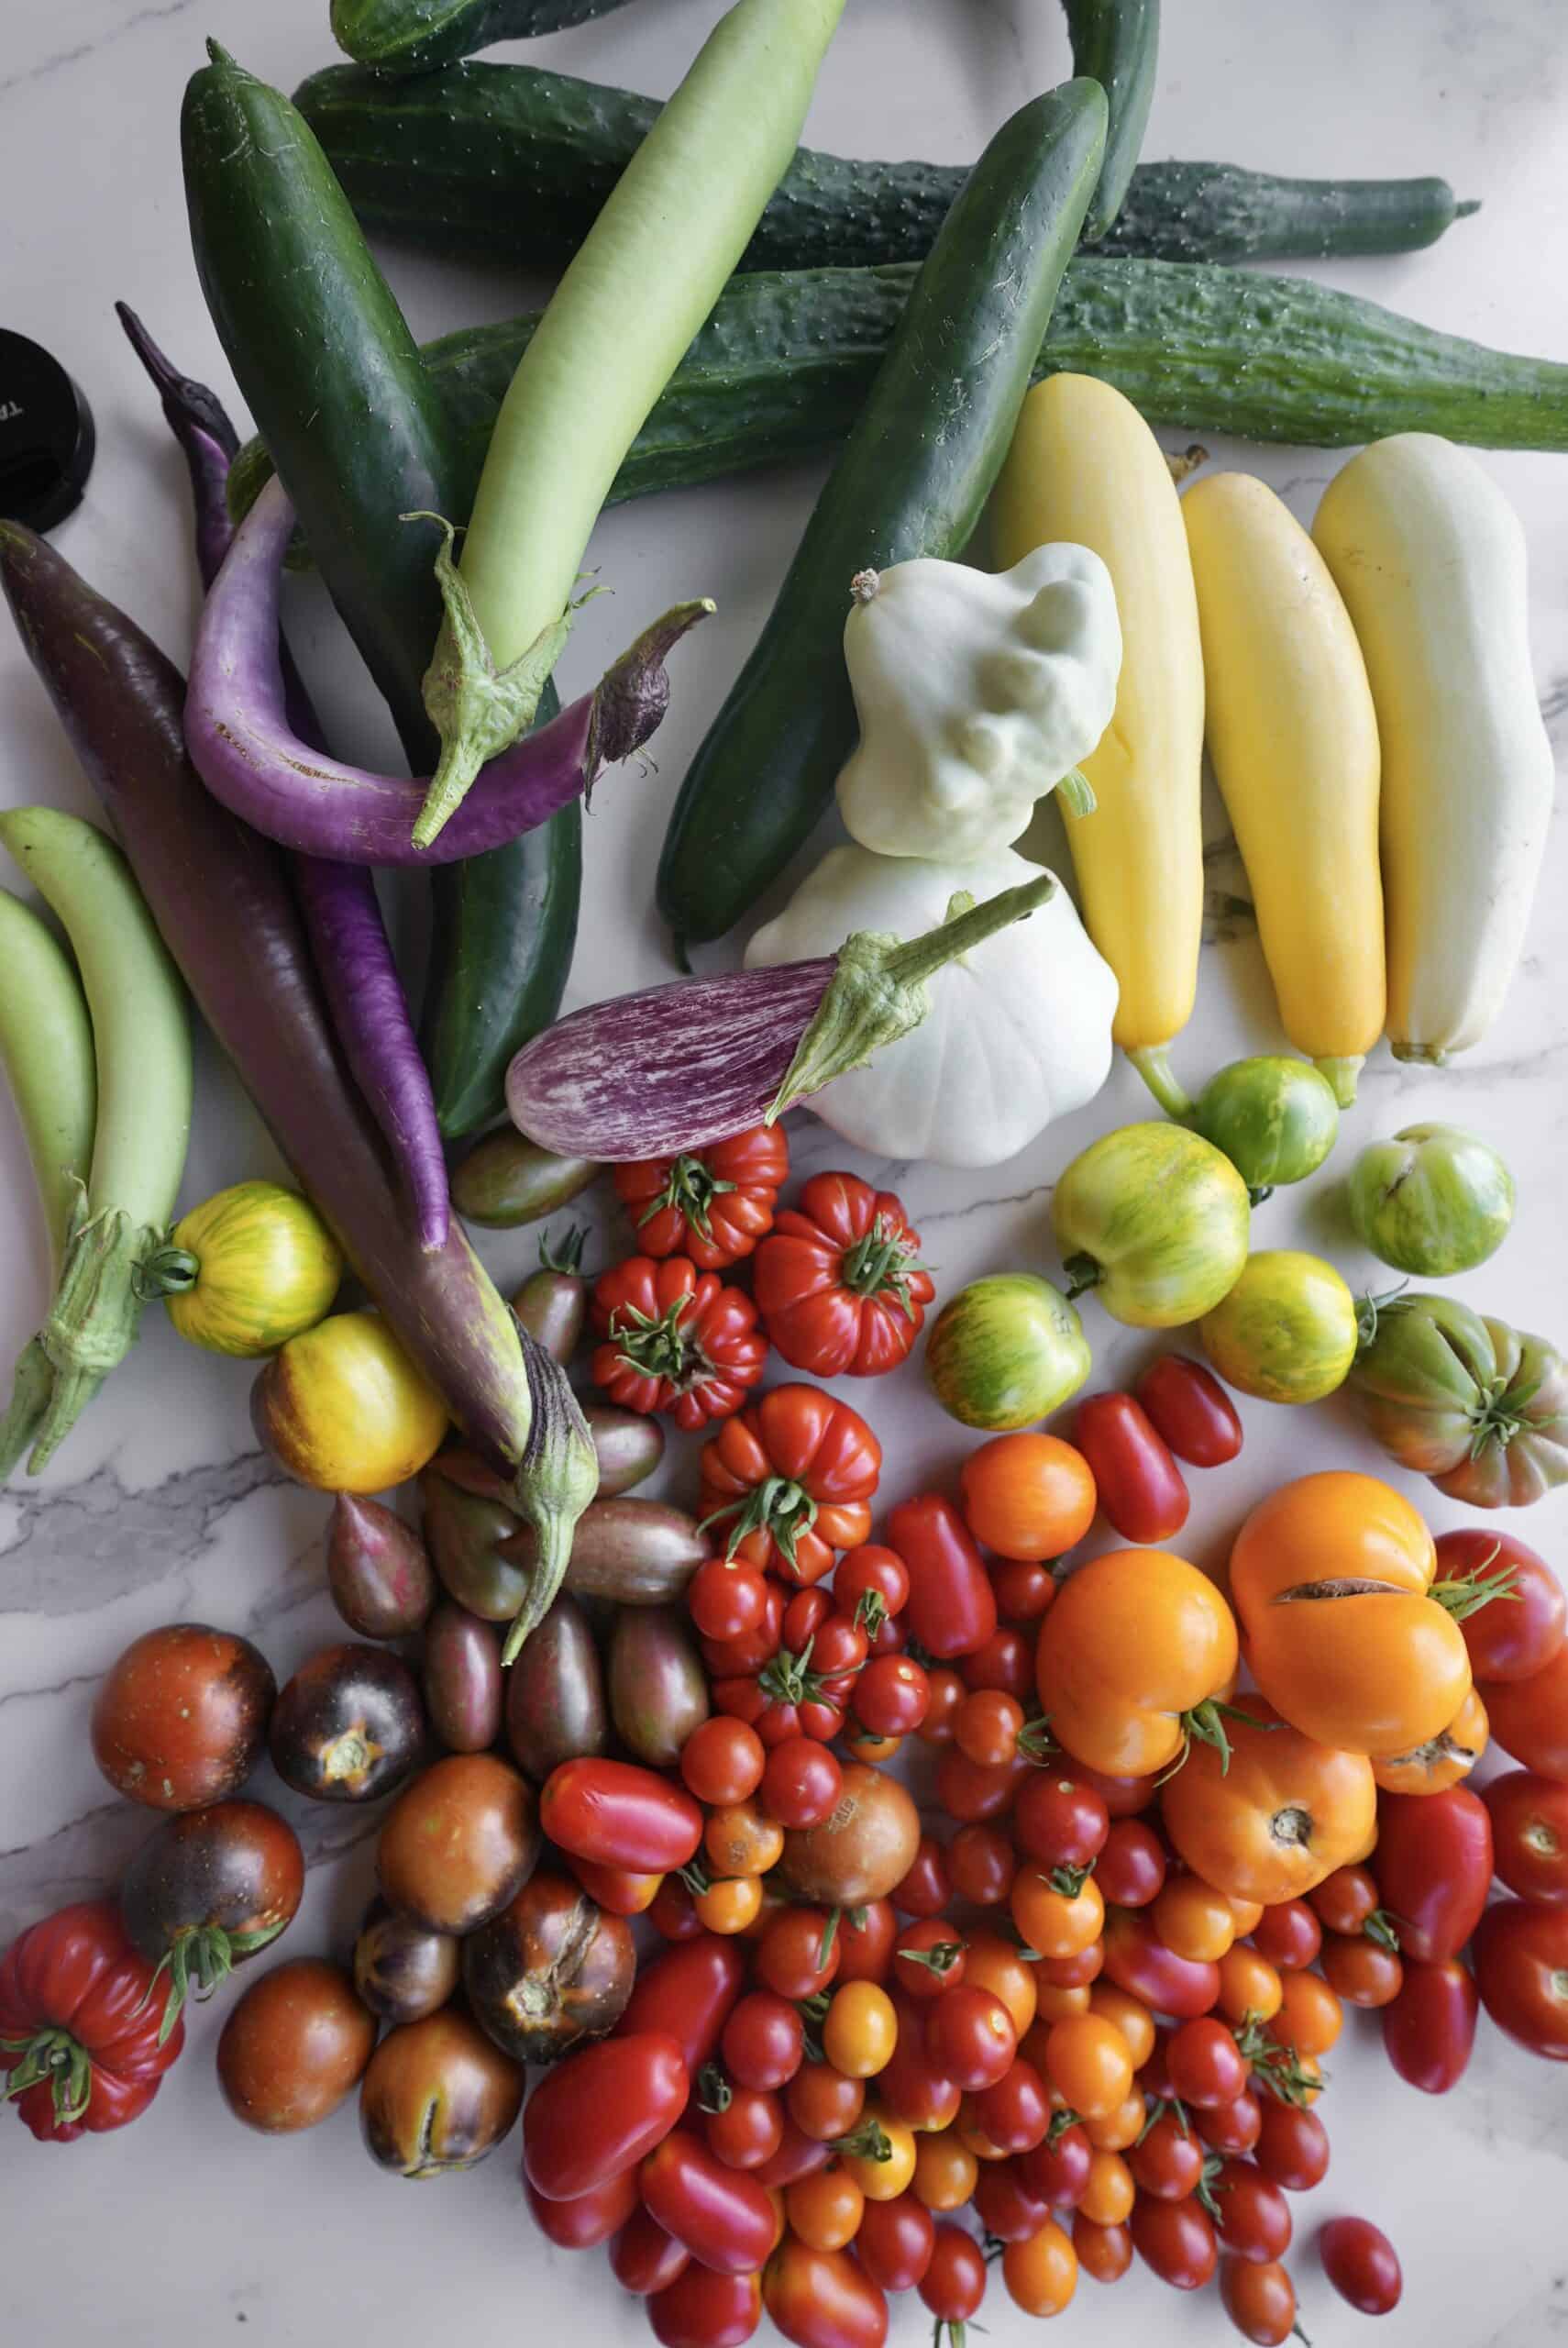
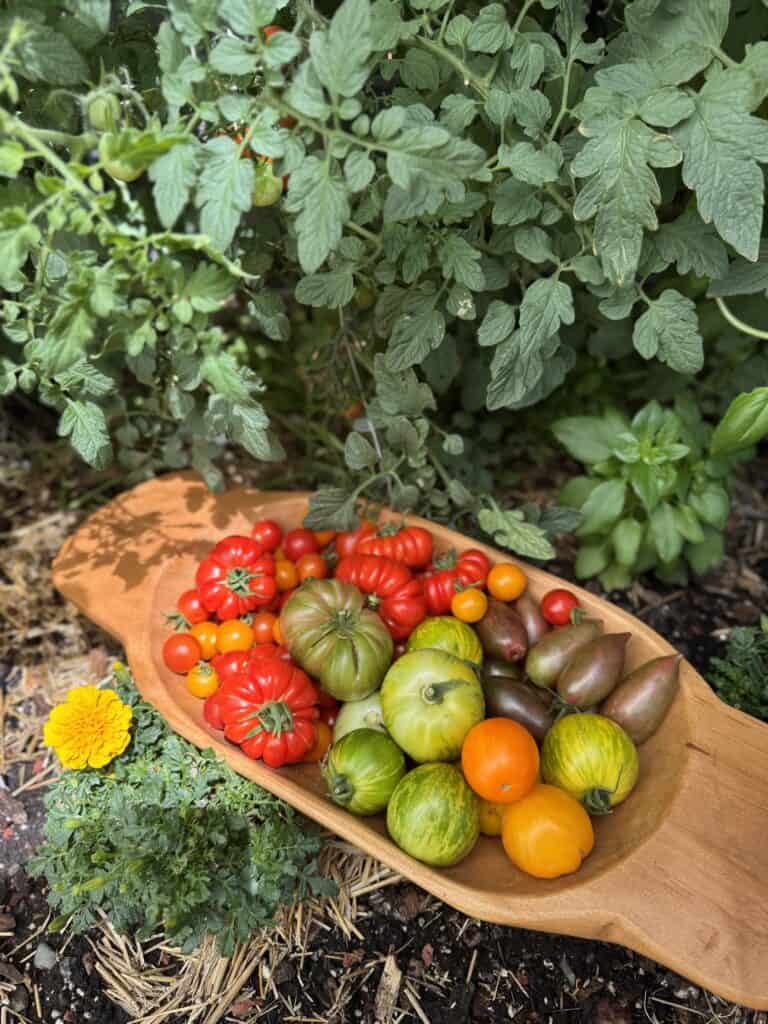
The main reason I got into gardening is because I love homegrown tomatoes. One of the first major projects I took on was DIYing a sturdy, two-row tomato trellis that could support 20 plants. After 5 years of growing 100+ pounds of tomatoes each season, my trellis is still holding up strong. Of all the trellises I’ve worked with and built, this is by far my favorite one, and my most highly requested one to write about.
A friend and I designed this trellis to be simple to build, very sturdy, and ideal for high yields.
In this post, I will walk you through how to build the same trellis in your own garden. I did my best to keep the steps clear and straightforward, but feel free to reach out if anything is unclear. Let’s get started!
Benefits of This Trellis:
• Maximizes vertical space, which is great for small gardens
• Perfect for indeterminate tomatoes, with a default height of 8 feet but easy to adjust
• Strong enough to support heavy plants
• Easy plant management
Materials You’ll Need:
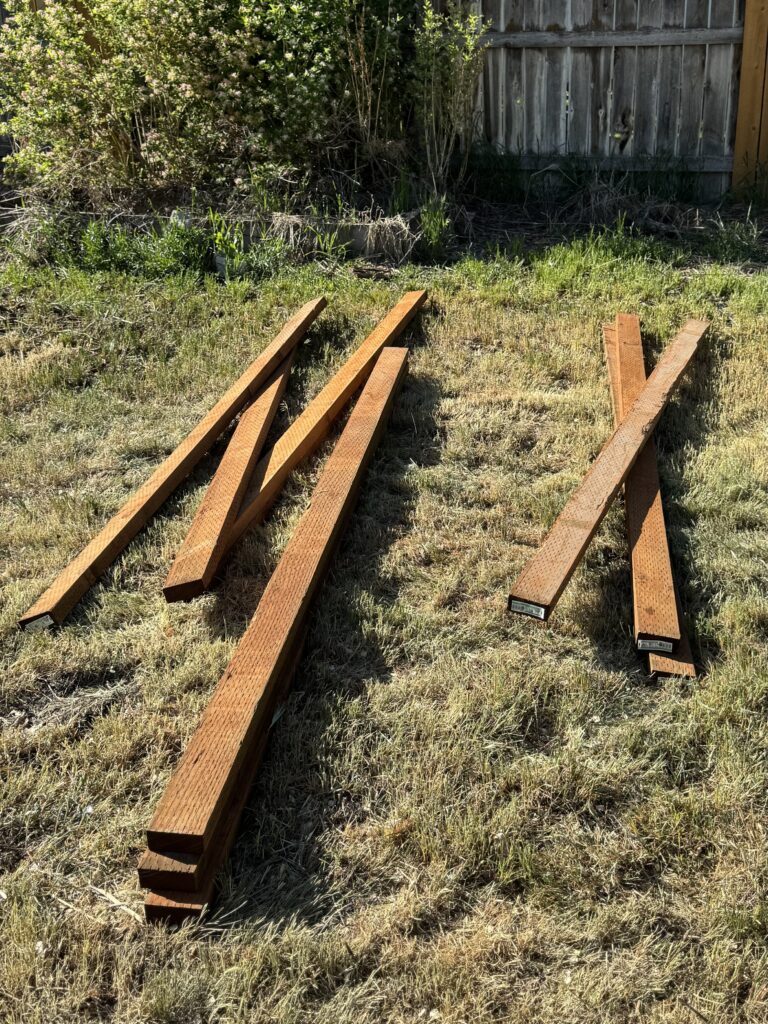
Lumber (the main component):
• 22 (8-foot), pressure-treated 2×4’s
• 2 (12-foot), pressure-treated 2x4s
Below, I’ll explain how you can decrease the amount of lumber you use if you’re able to attach the trellis directly to a fence (which is what I did in my own backyard). However, this is the amount of wood I recommend if you want the trellis to be completely free-standing.
Note: 5 of the 8-foot 2×4’s will need to be cut in half. In addition, three more of the 8-foot 2×4’s will need to be cut for the side cross bracing. However, the exact dimension will depend on where you place the center brace.
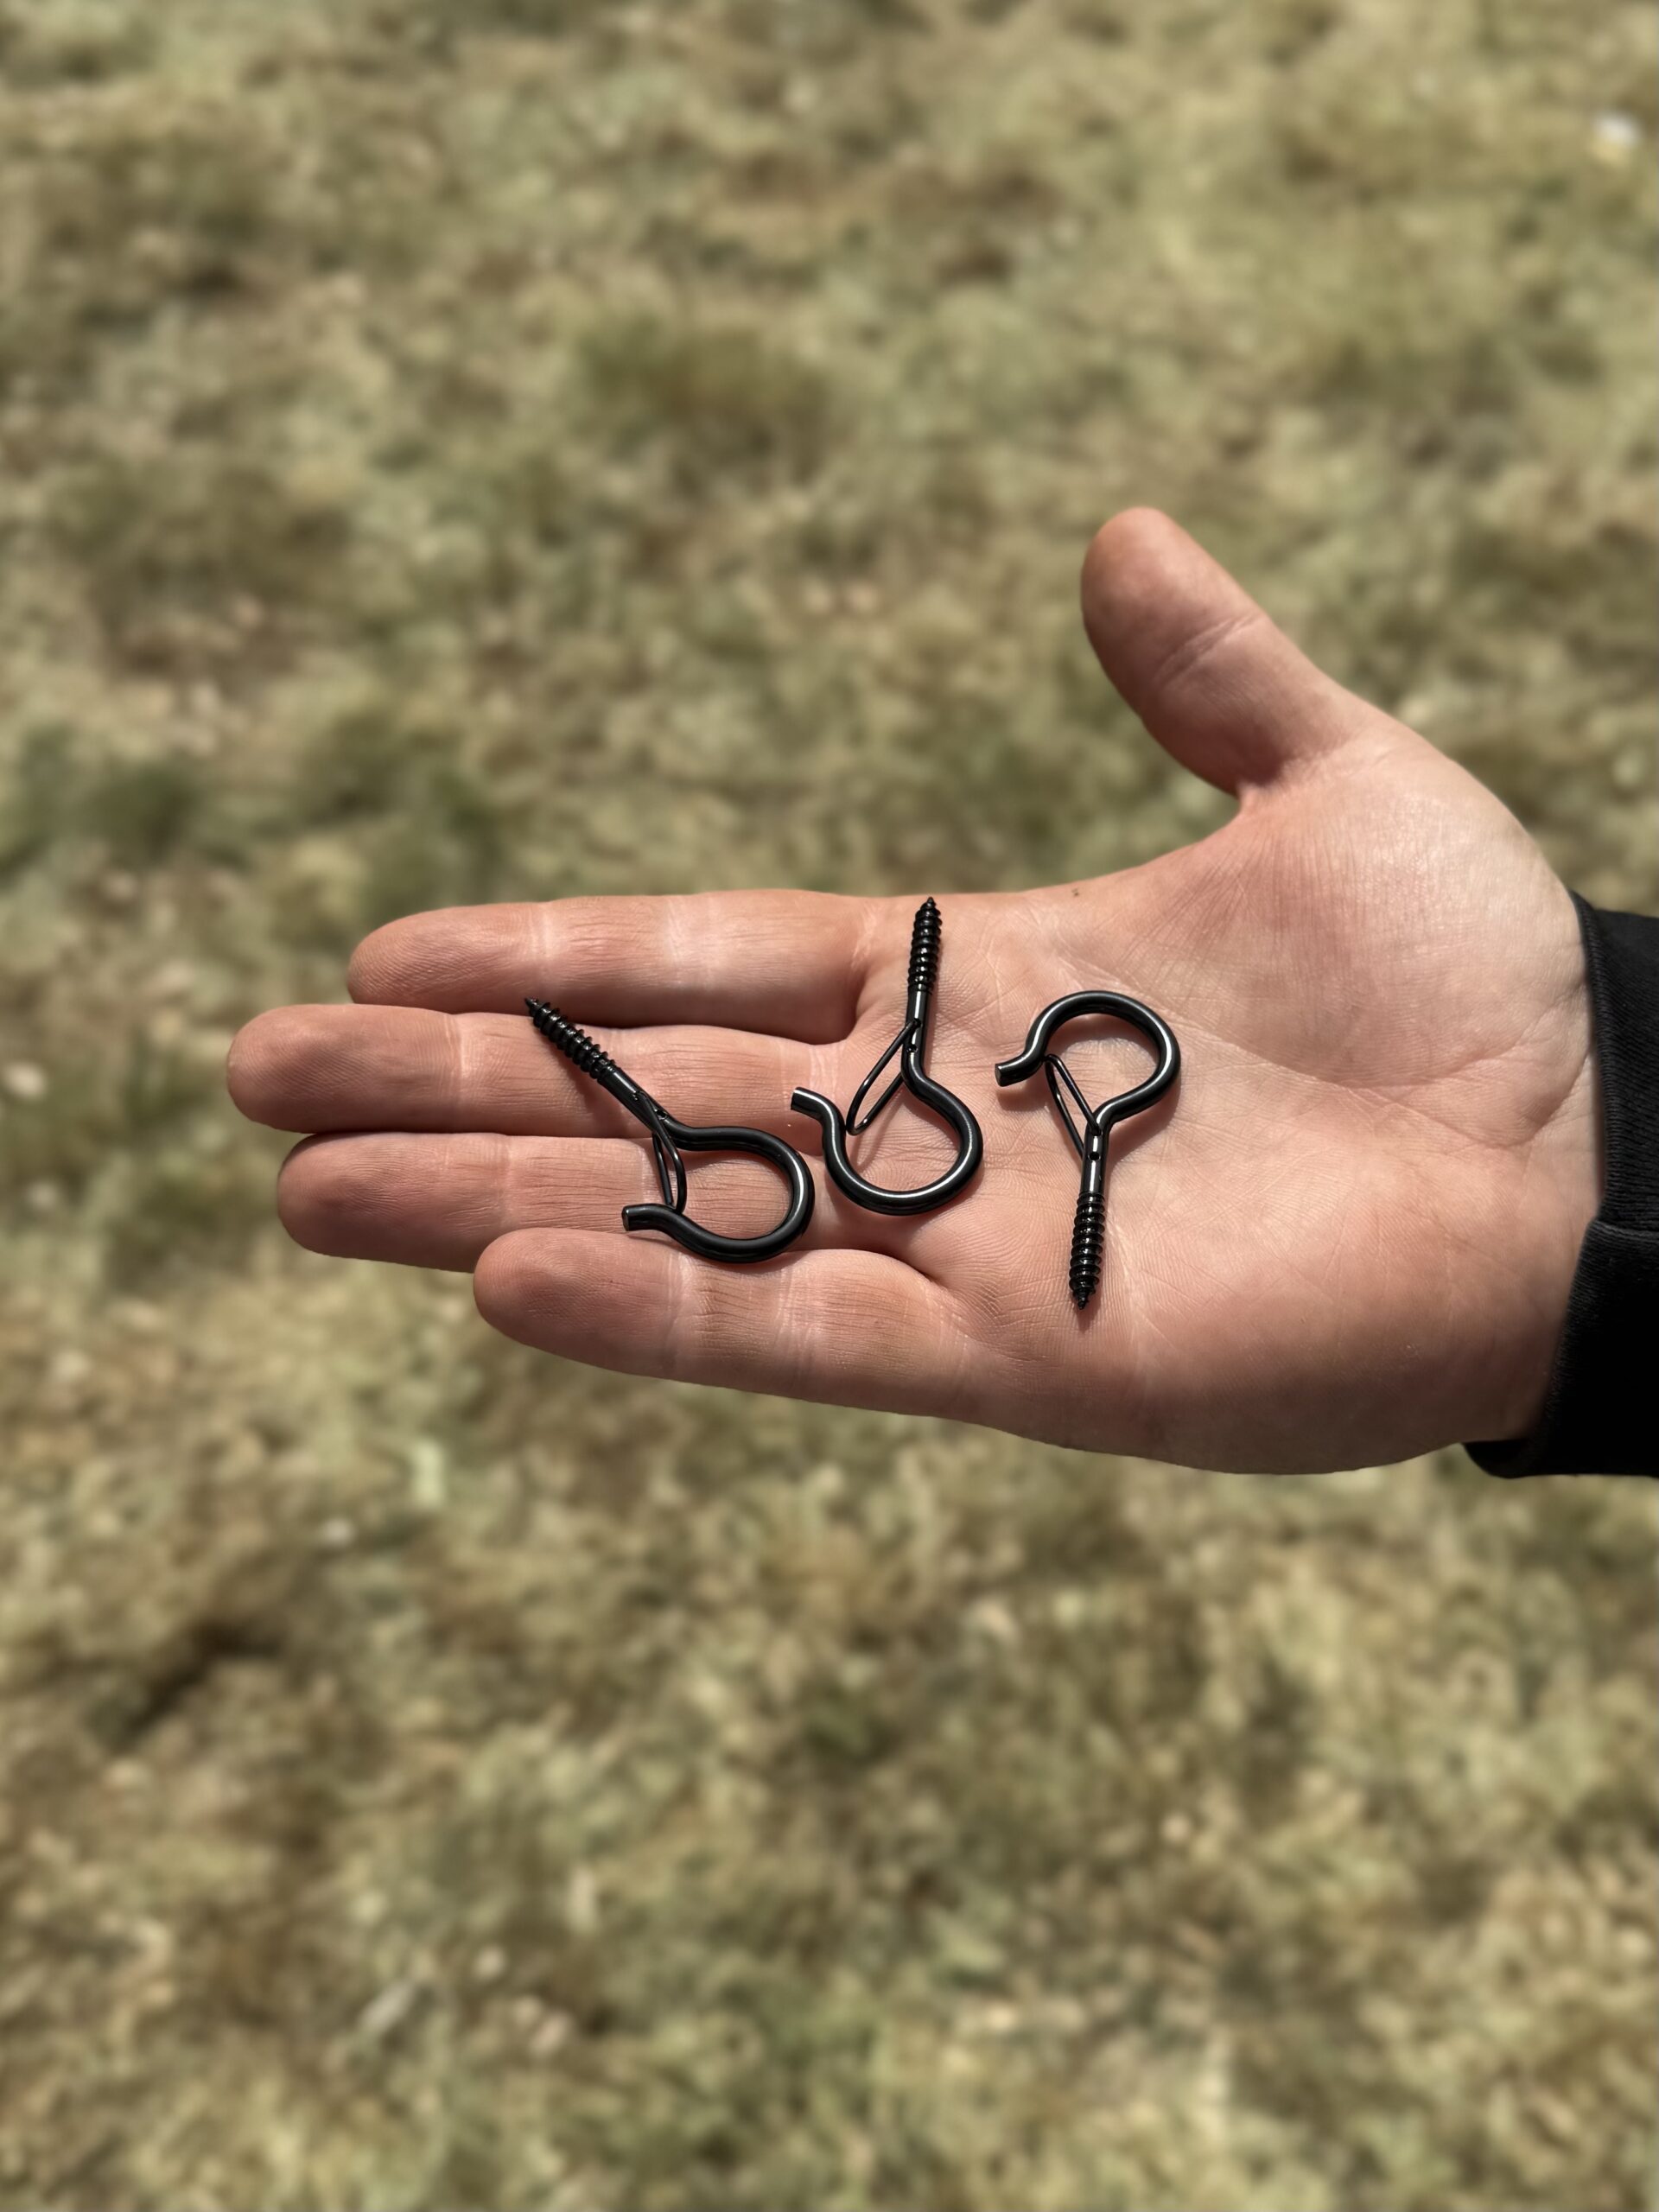
Hardware:
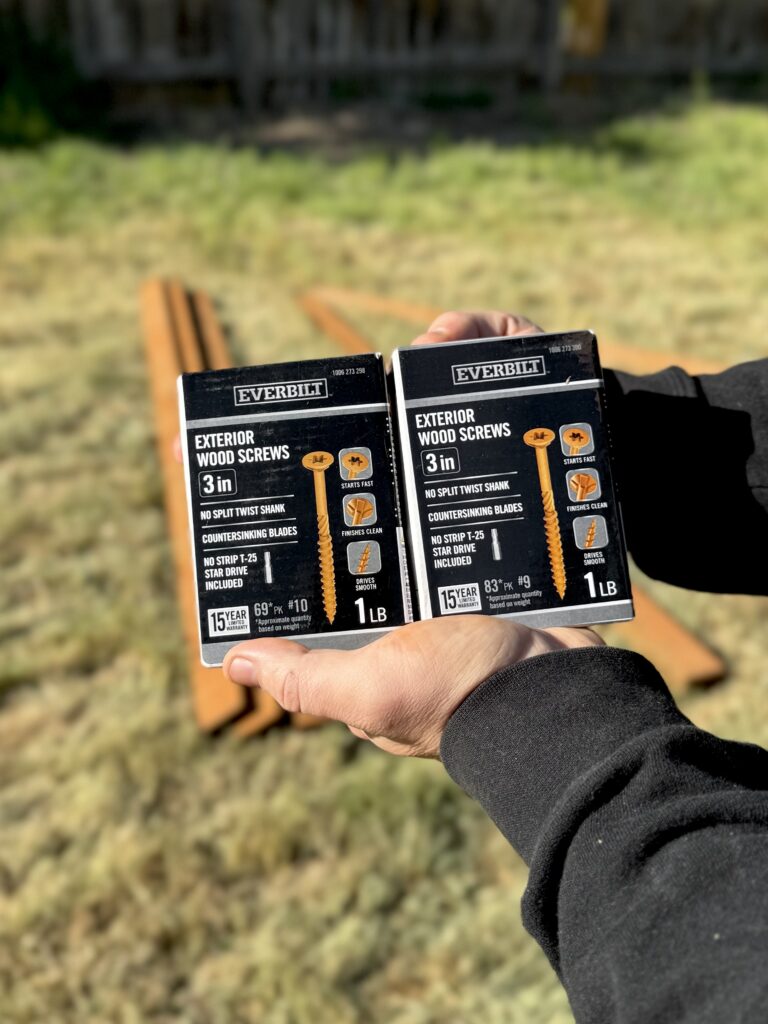
• 3-inch exterior wood screws (2 lb box), plus a drill/impact driver
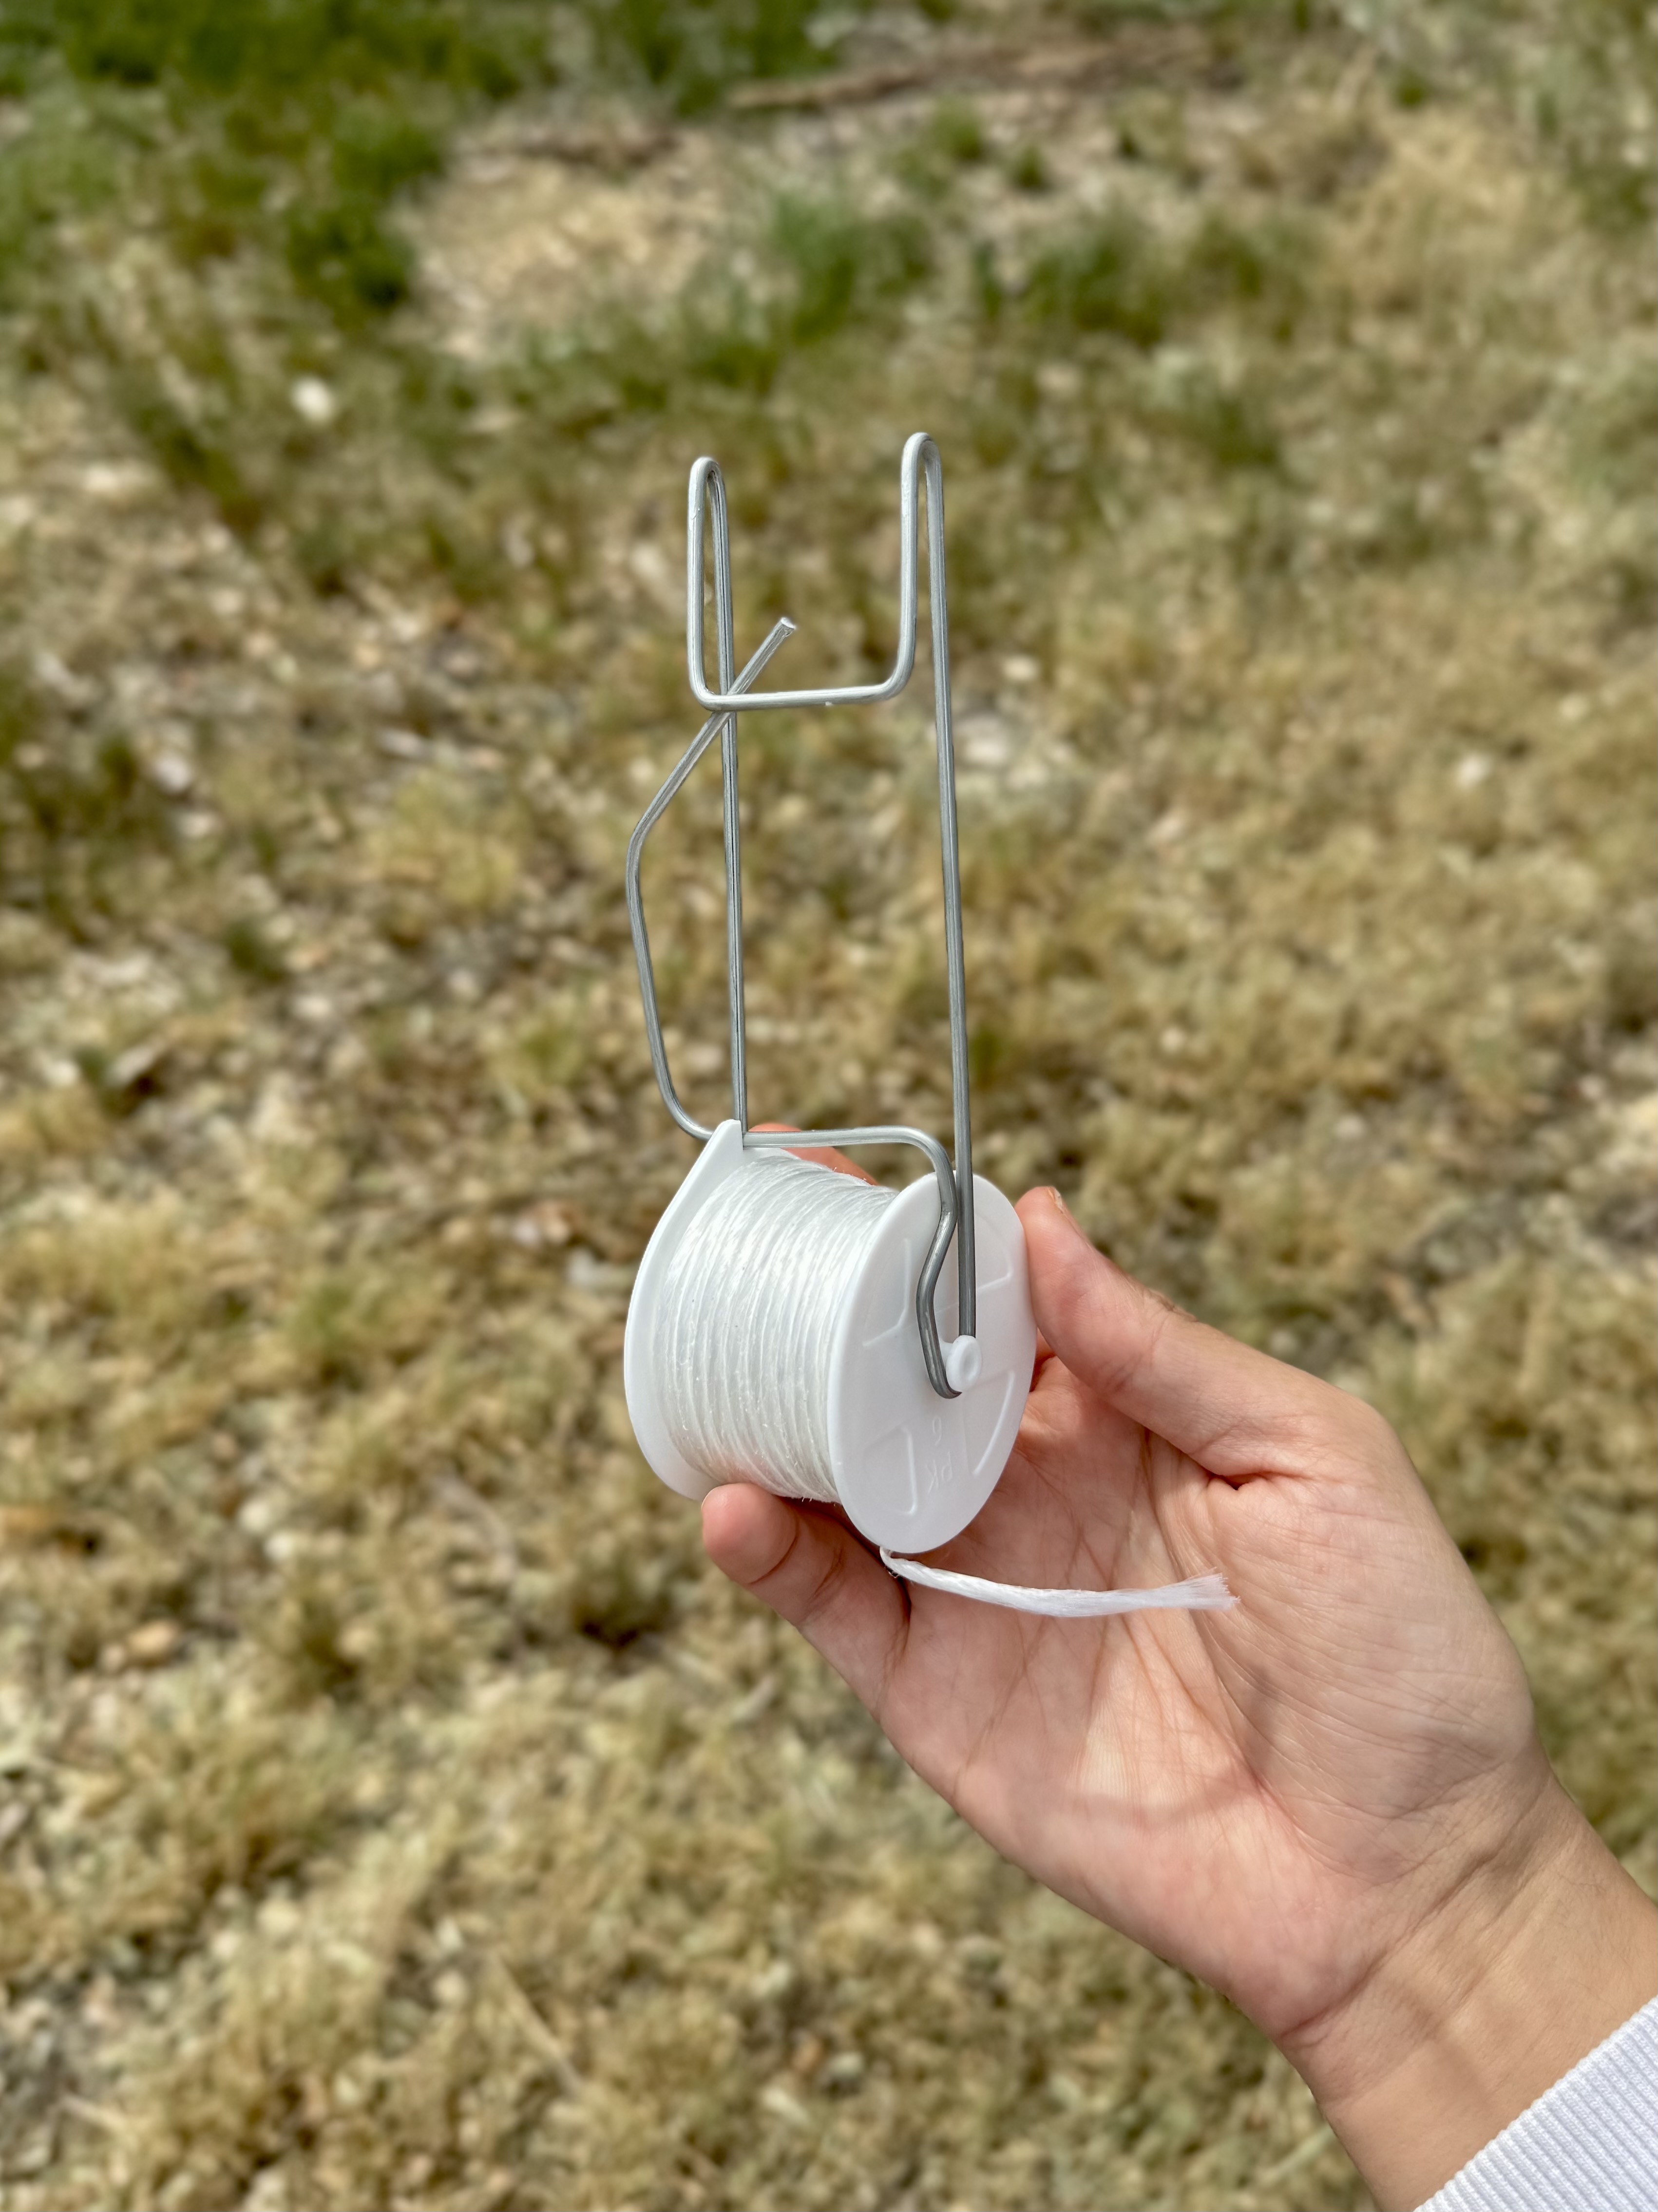
• 40 screw hooks
• 20 roller hooks
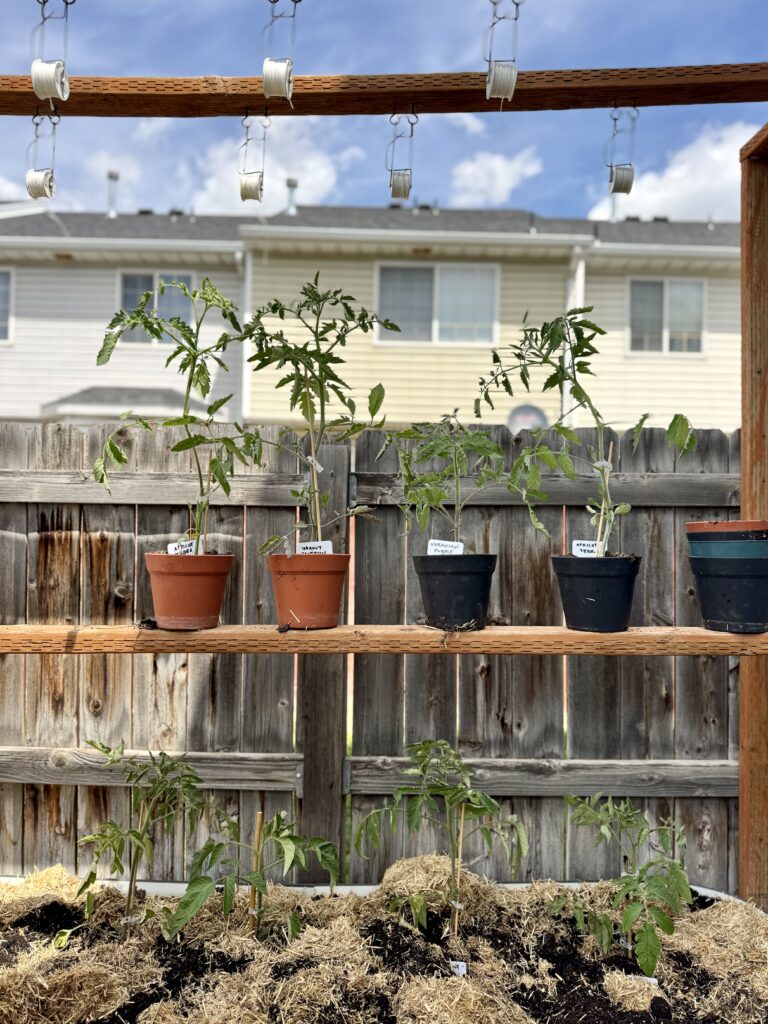
The roller hooks are essentially spools of string for adjustable support – you can also tie string directly to the hooks if you don’t want to buy roller hooks, but these are convenient and will last you a long time. I’ve been using the same roller hooks for the last 5 years, and they still have a lot of life in them!
Trellis Cost Breakdown
| Item | Quantity | Unit Cost | Subtotal |
|---|---|---|---|
| 8 ft 2×4 lumber | 22 | $7.78 | $171.16 |
| 12 ft 2×4 lumber | 2 | $12.68 | $25.36 |
| 3-inch exterior wood screws | 1 pack | $10.00 | $10.00 |
| Screw hooks (40 count) | 1 pack | $22.00 | $22.00 |
| Roller hooks (20 count) | 1 pack | $28.00 | $28.00 |
Grand Total: $256.52
My exact trellis only took 17 8 ft. 2×4’s with no cross-bracing because I drilled it directly into my fence. This saved me about $50 in lumber.
*Note that this pricing is based on where I live, and how much these materials cost in 2026 for me.
Instructions
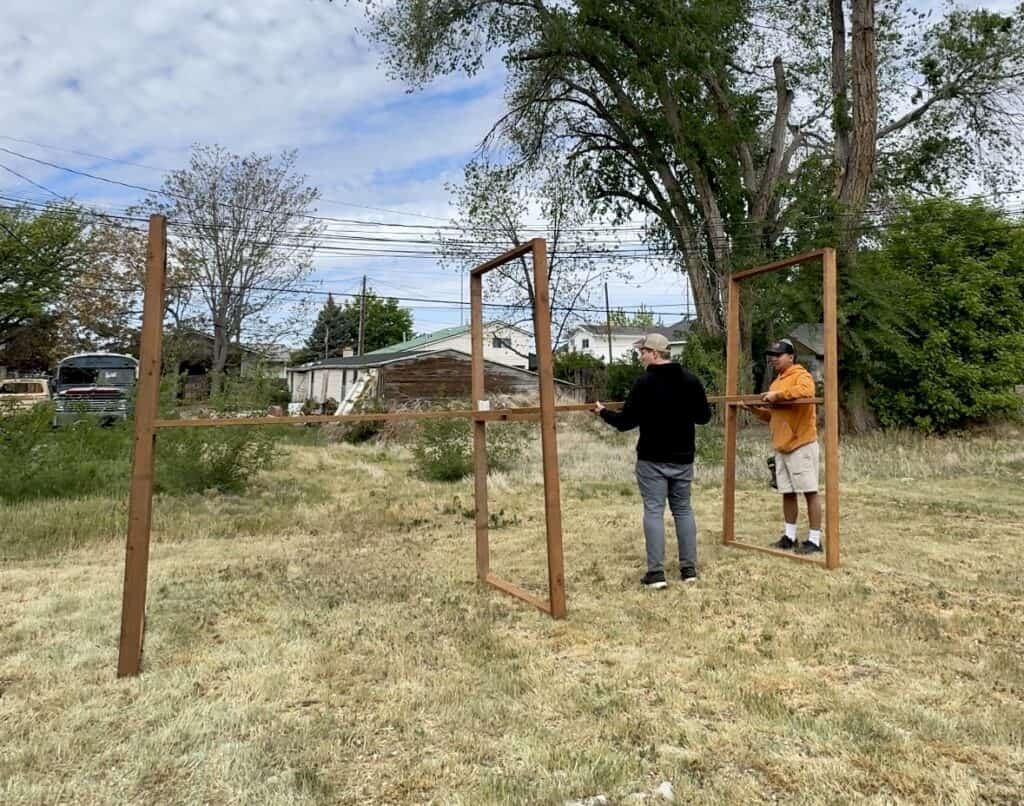
The entire structure is built using three wooden rectangles that are simple to assemble. These rectangles form the freestanding base, and the two rows of roller hooks attach to them.
Step 1: Build Three Identical Rectangle Frames
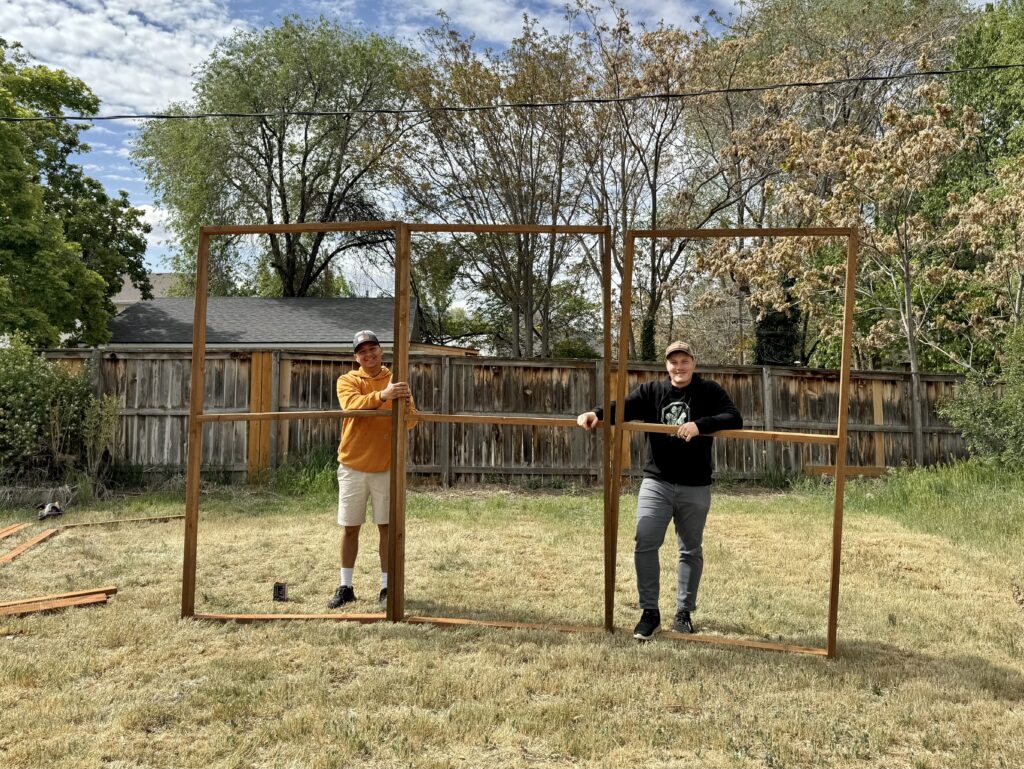
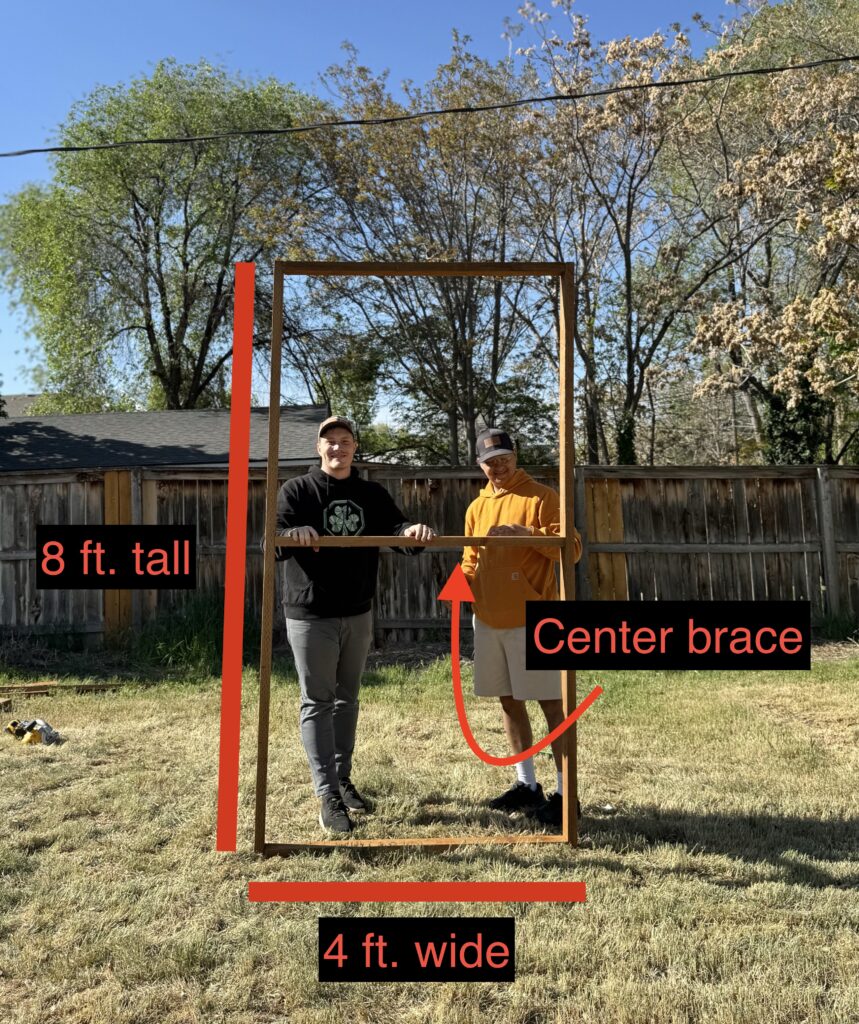
Each frame should be:
• 8 feet tall
• 4 feet wide
To build one frame:
- Use two full 8-foot 2x4s for the vertical sides
- Cut another 8-foot 2×4 into two 4-foot pieces for the top and bottom. Drill at least two screws in from the sides on every connecting point.
- Cut a third 4-foot piece and install it across the center as a brace. Again, drill in at least two screws on each side.
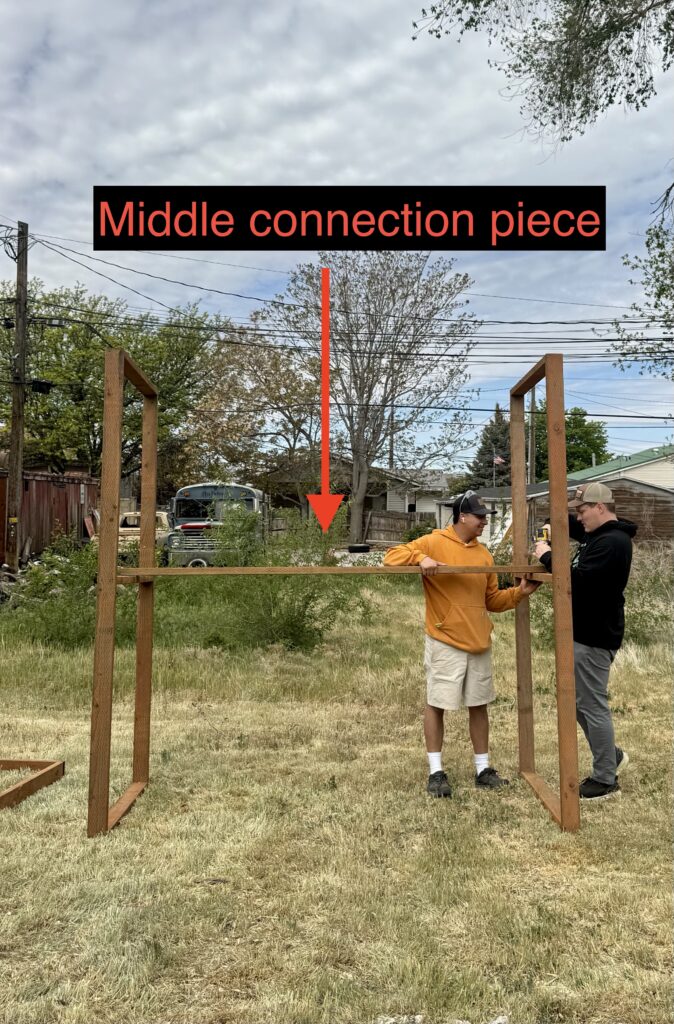
I place the center brace slightly below chest height. The center brace (circled in the photo below) should be positioned the same height on all three frames, because the middle connection is going to sit on top of them (again, see photo below) – I’ll touch on this in the next step.
I like to use the middle connection piece as a table of sorts while I’m gardening. In the photo, you can see the plants resting on it. Because of this, I put the center brace below chest height so that it’s easy to use it as a “table” and reach it!
So each of the three rectangles should include:
• A top and bottom
• One middle support for strength
• A total of 3.5 eight-foot 2x4s
Repeat this process three times to make three rectangular frames.
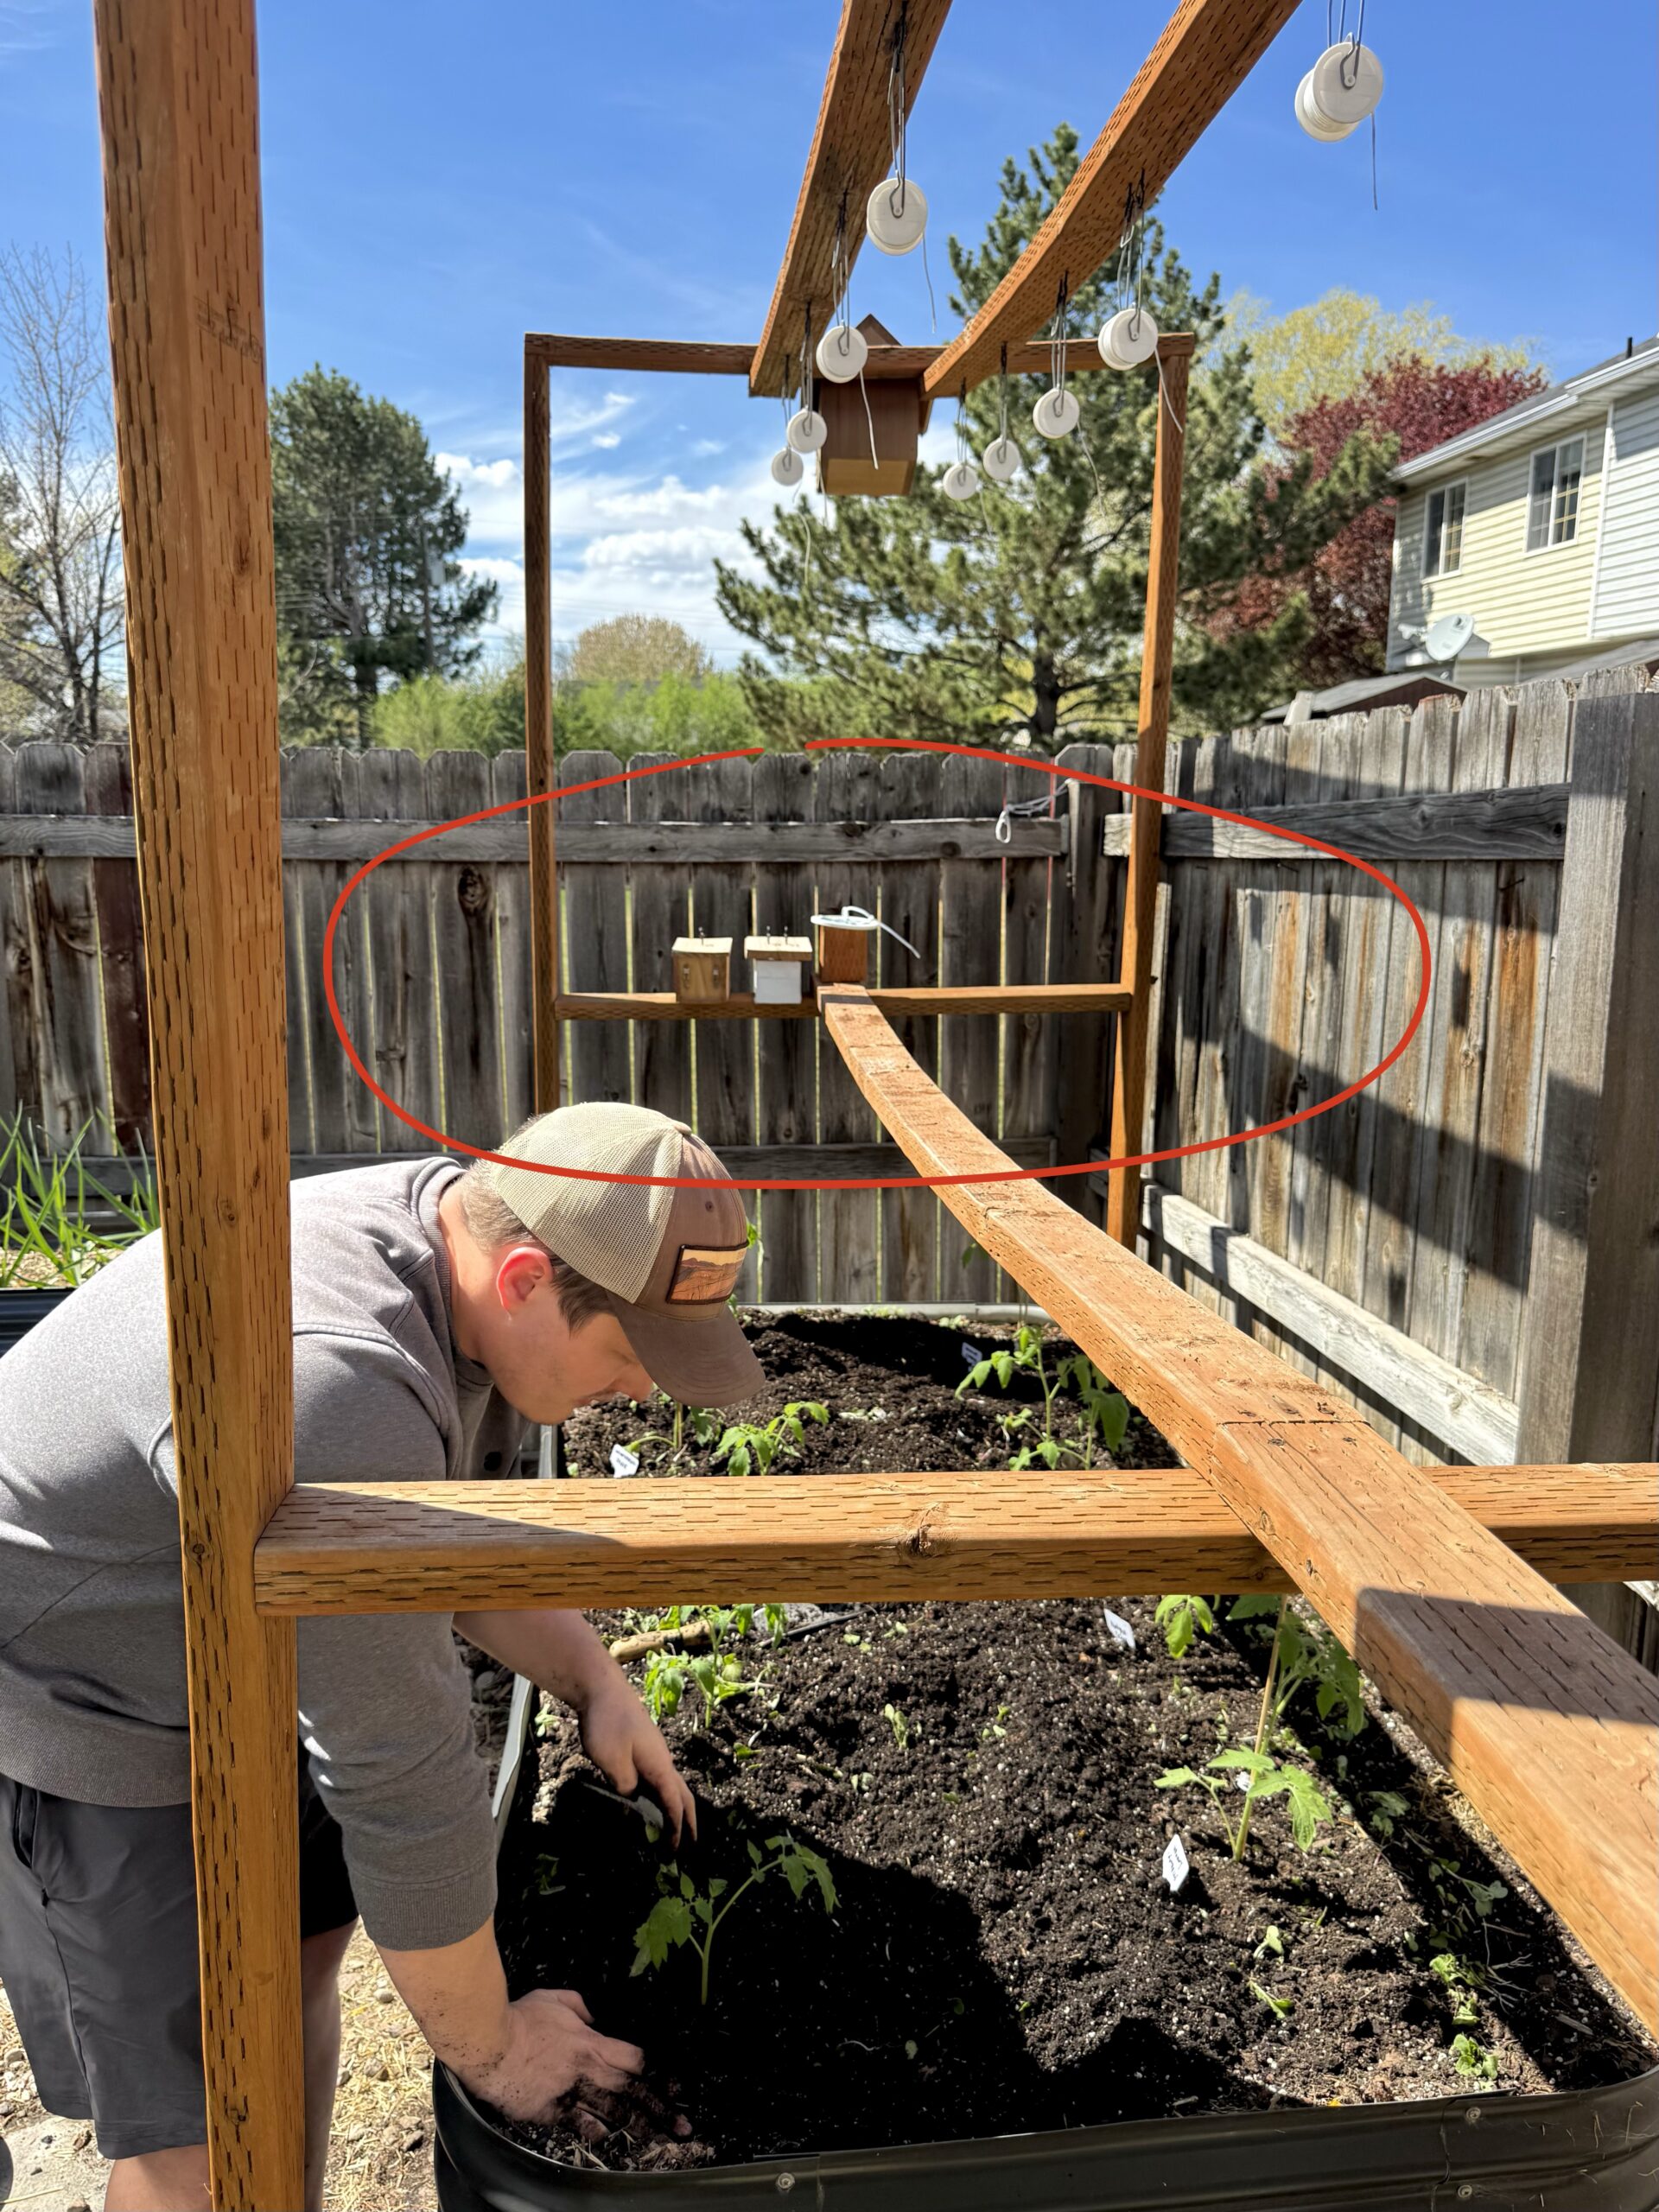
Step 2: Connect the Three Frames
With at least one other person (preferably two other people for extra support), stand the three rectangular frames upright and connect each of the rectangles using 8-foot 2x4s – this is the middle connection piece I spoke of above. Place it directly on top of the center braces of the frames.
Note that the two connecting boards will share space on the middle frame, while the outer frames each have one board and can use the full width.
In total you will need to use:
• Two 8-foot 2x4s, one on each side
• At least 2-3 screws at every connection point
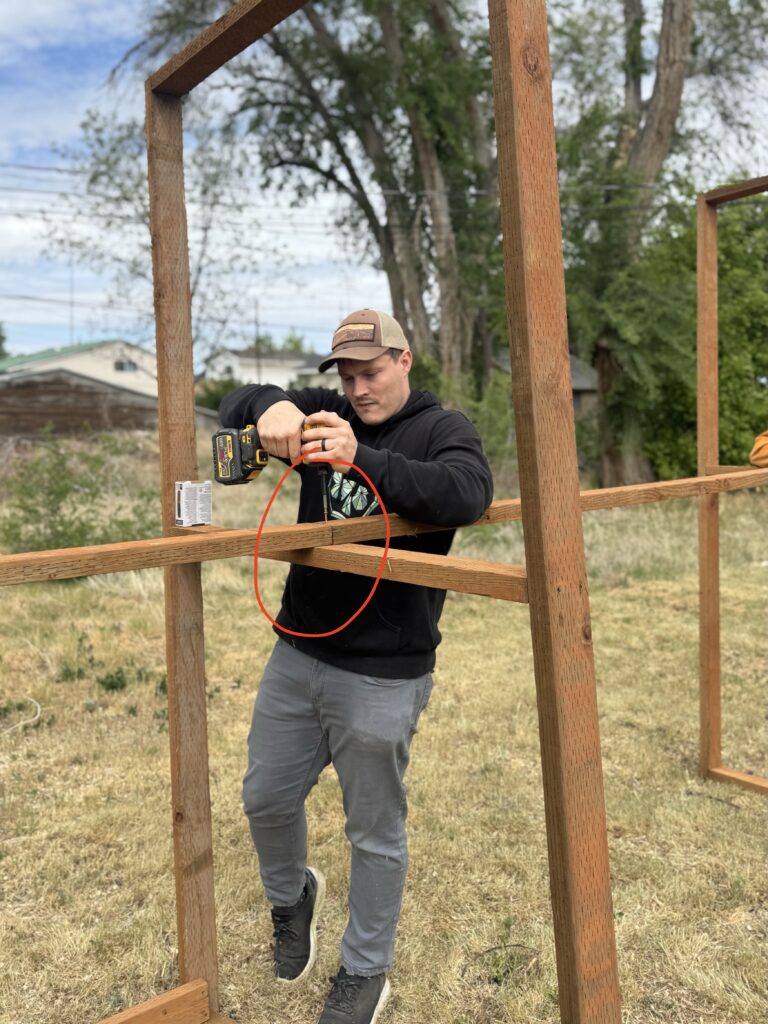
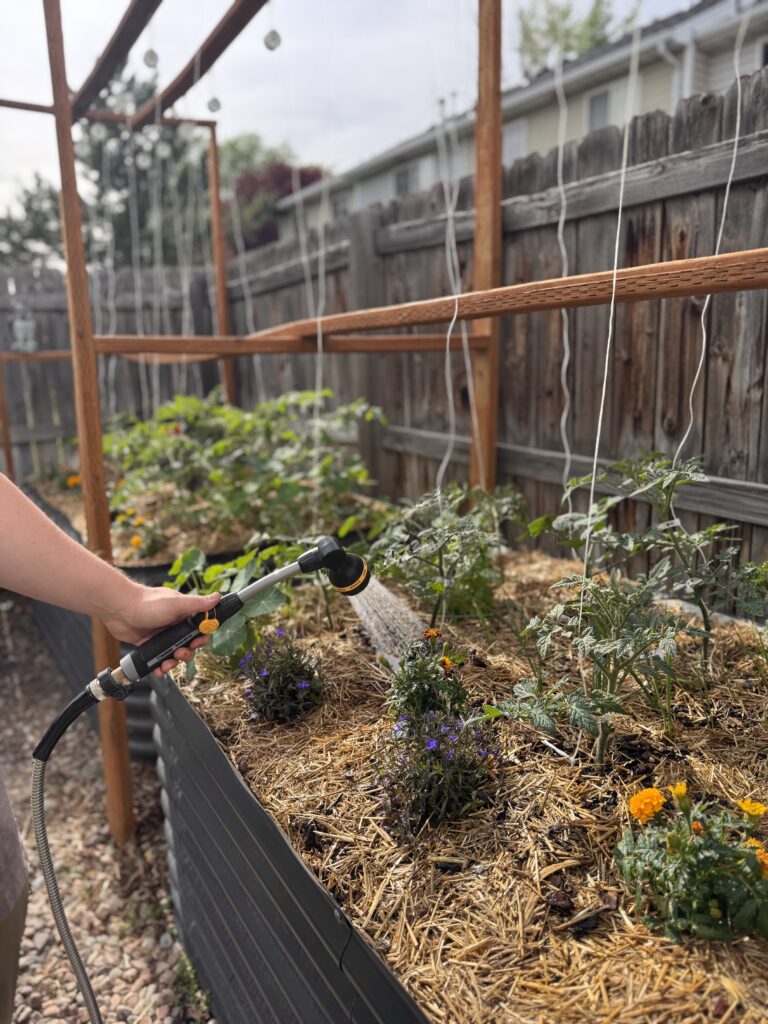
Like I said, this middle connection is one of my favorite features. It creates a convenient table-like surface above the raised bed, gives you something to lean on when reaching across, and works well for supporting covers like frost cloth. At this stage, the trellis will not be fully rigid, but it should stand on its own if the ground is level.
Step 3: Add Bottom Support

Screw in one 8-foot 2×4 across the bottom of each section to strengthen the base. Use 2-3 screws, as this base piece helps support the structure and needs to be secure.
With boards now running across both the middle and the bottom, the structure will feel much more stable.
Step 4: Connect the Three Frames on the Top
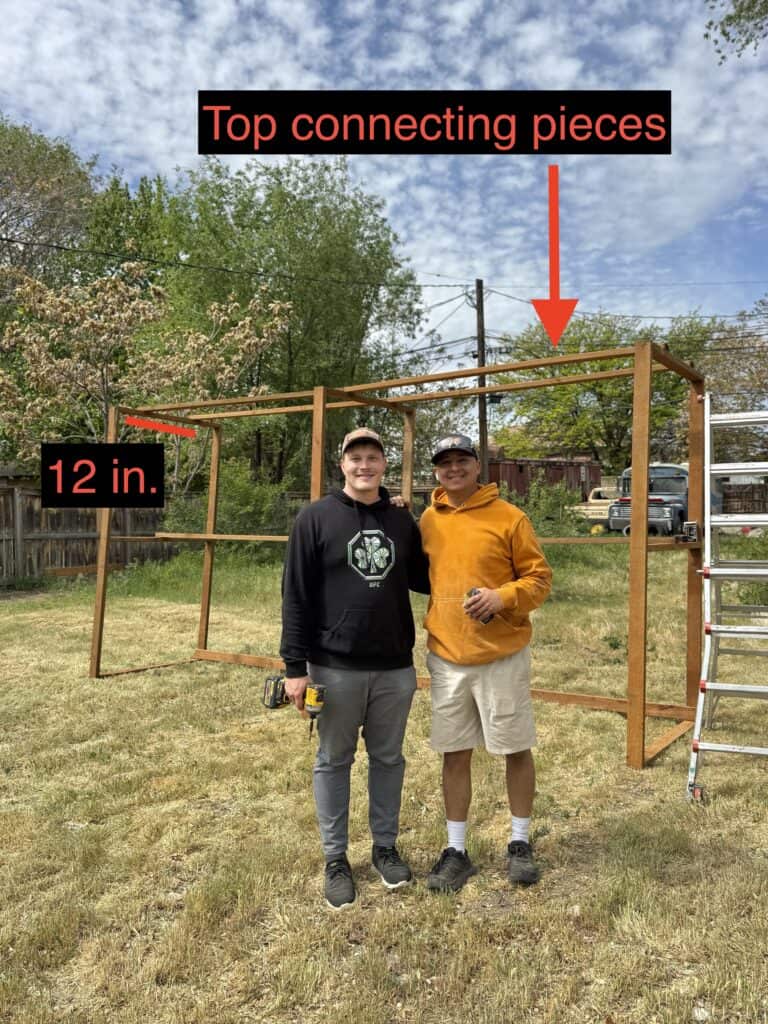
Using a ladder, use a marker/pen to mark the middle of the top center brace on each rectangular frames. From each middle point, measure and mark 6 inches outward on both sides. This will create two outer guide marks with 12 inches between them. Position your four 8-foot 2x4s on these outer marks so they run across the top of the trellis in two parallel rows, with 12 inches of space between the boards. Screw them in.
Note that it’s on these boards that your hooks and roller spools will be installed. So in total, here’s what you should have used:
• Four 8-foot 2x4s (two per side)
At this point, you will have a solid freestanding trellis. You can stop here if you plan on attaching it to your fence, or continue with additional reinforcement if not.
Step 5: Add Cross-Bracing for Maximum Strength
Standing at the back of the trellis, check the two lower outer corners (shown below) to make sure they form true 90-degree angles. This step is recommended before installing the cross bracing, because once the cross braces are added, they will lock the entire trellis into its final shape. If the structure is not square, the finished trellis may look visibly uneven, and may lose structural integrity.
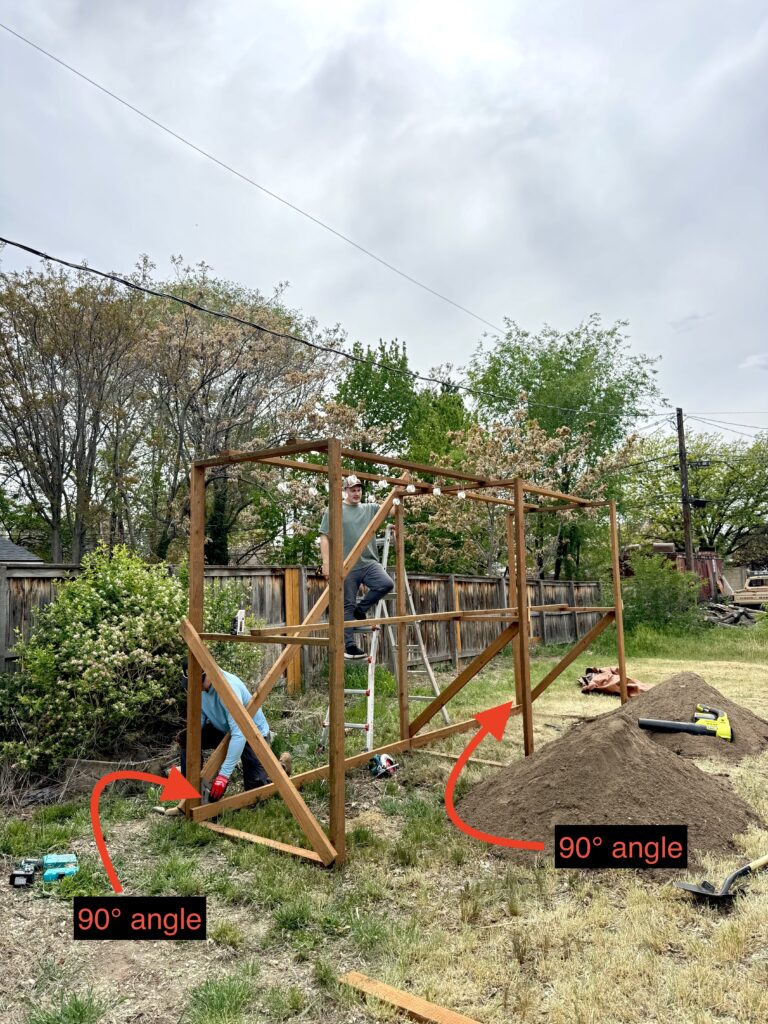
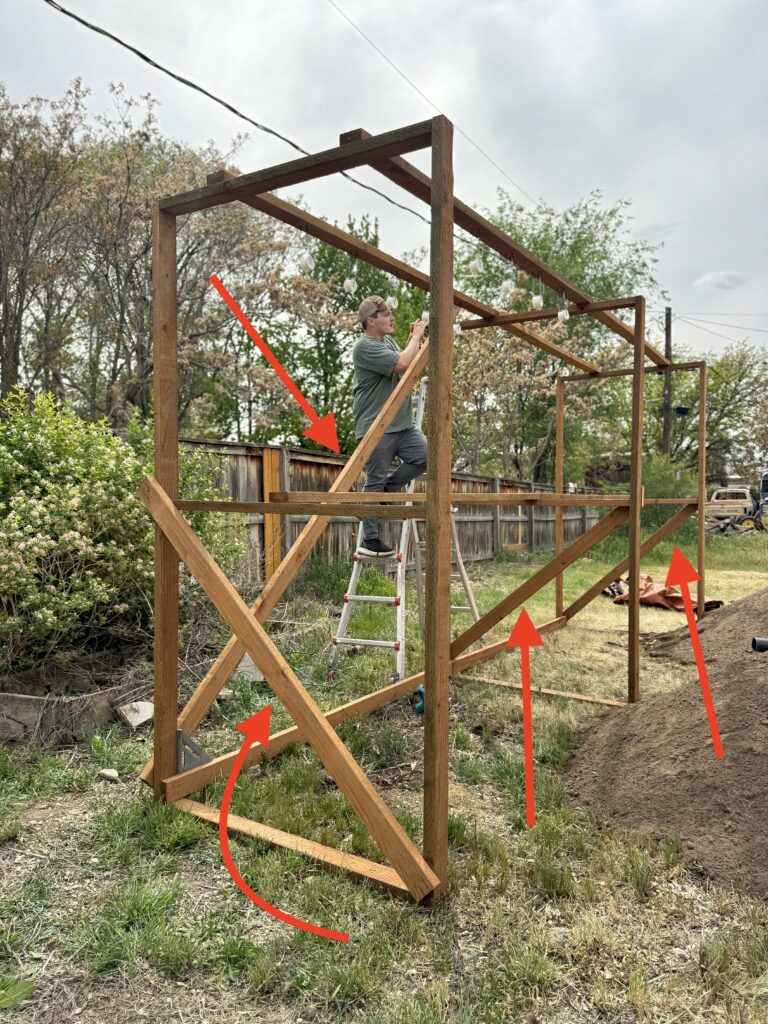
Once the frame is confirmed to be square, install two 12-foot 2x4s diagonally across the back of the trellis. These cross braces help prevent side-to-side movement and improve overall stability. If the frame isn’t square, then have one person line it up while the other screws in the cross bracing.
You can also add smaller diagonal braces inside the lower portion of each rectangle frame for side cross bracing (see photo). If you do this, you will need one 8-foot 2×4 for each rectangular frame that you want to reinforce. For me, I put one on each frame, so I used a total of three more. My buddy used his saw to cut off any wood that jutted out.
With cross bracing installed, the trellis becomes extremely sturdy.
Step 6: Add Your Roller Hooks
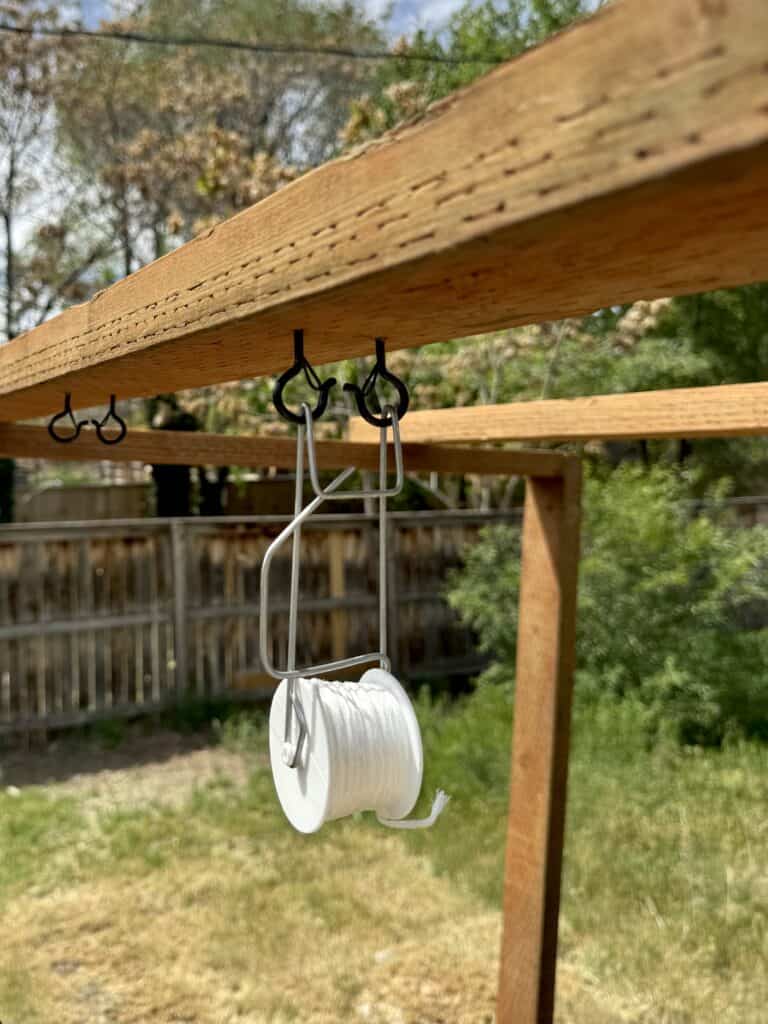
- Use your roller hooks to mark where the screws will go
- Drill pilot holes to make installation easier
- Screw black hooks into the pilot holes
- Clip roller hooks (or tie string) directly to the hooks
- Once you’re growing tomatoes, use tomato clips to guide plants upward as they grow
This step transforms the structure into a highly efficient vertical growing system!
How I Used Less Wood
I touched on this above, but incase you missed it: I was able to use less wood because I did not use cross bracing, or bottom supports on my trellis. I was able to do so since I screwed my trellis directly to a fence, which provided plenty of support.
In so doing, I omitted:
• Two 12-foot 2x4s for back cross bracing
• Three 8-foot 2x4s for side cross bracing
• Two 8-foot 2x4s for bottom support
If you don’t have a fence to attach this trellis to, however, definitely include those extra pieces for maximum strength. Since it’s a freestanding structure, it needs plenty of support!
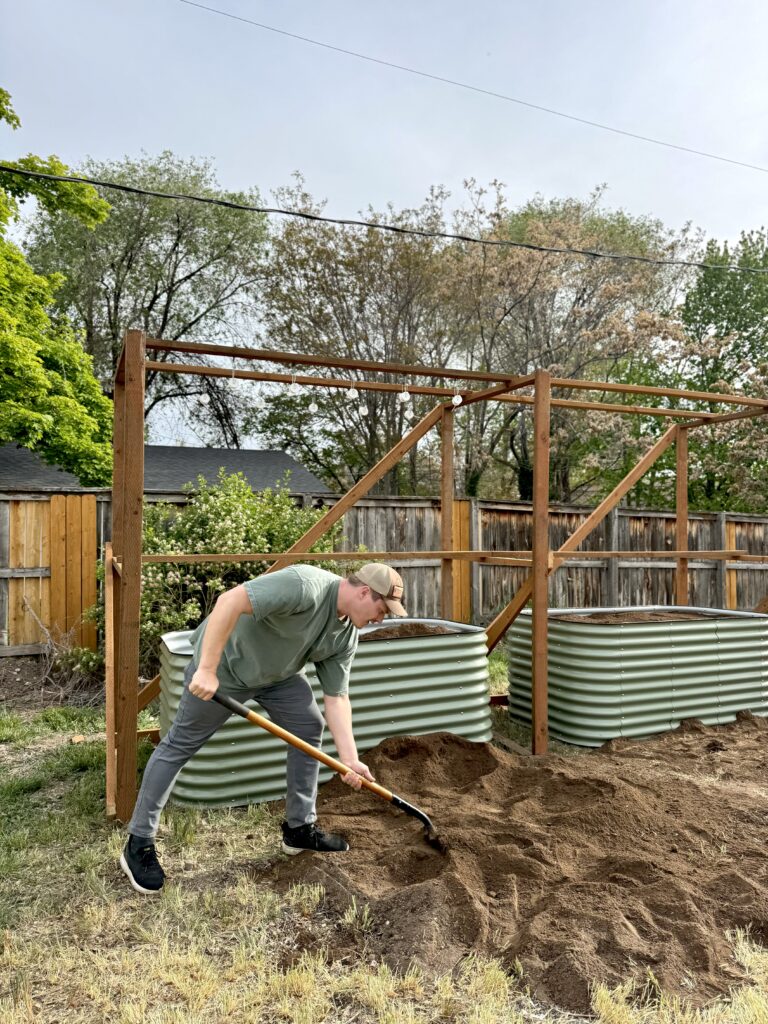
How to Use This Type of Trellis
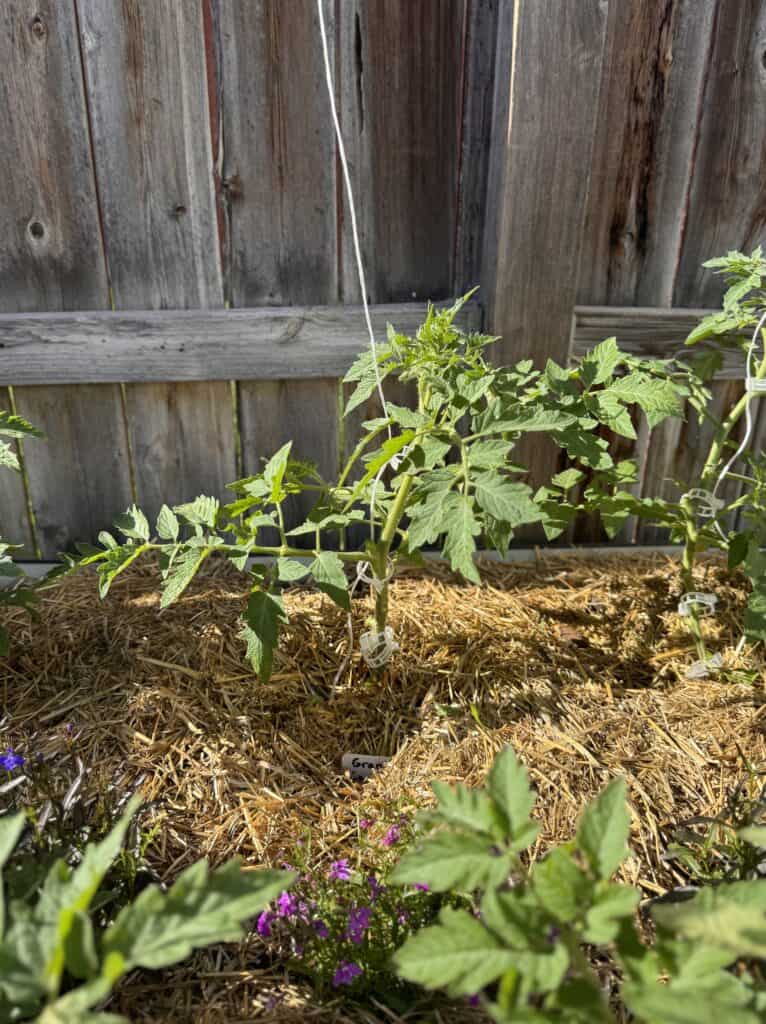
At the beginning of each gardening season, I release just enough string from the roller hook to reach the soil. From there, I tie the string onto a garden staple that I secure at the base of each plant. Securing the line to the staple instead of the plant itself will ensure that when the wind blows, it will tug on the staple instead of the plant.
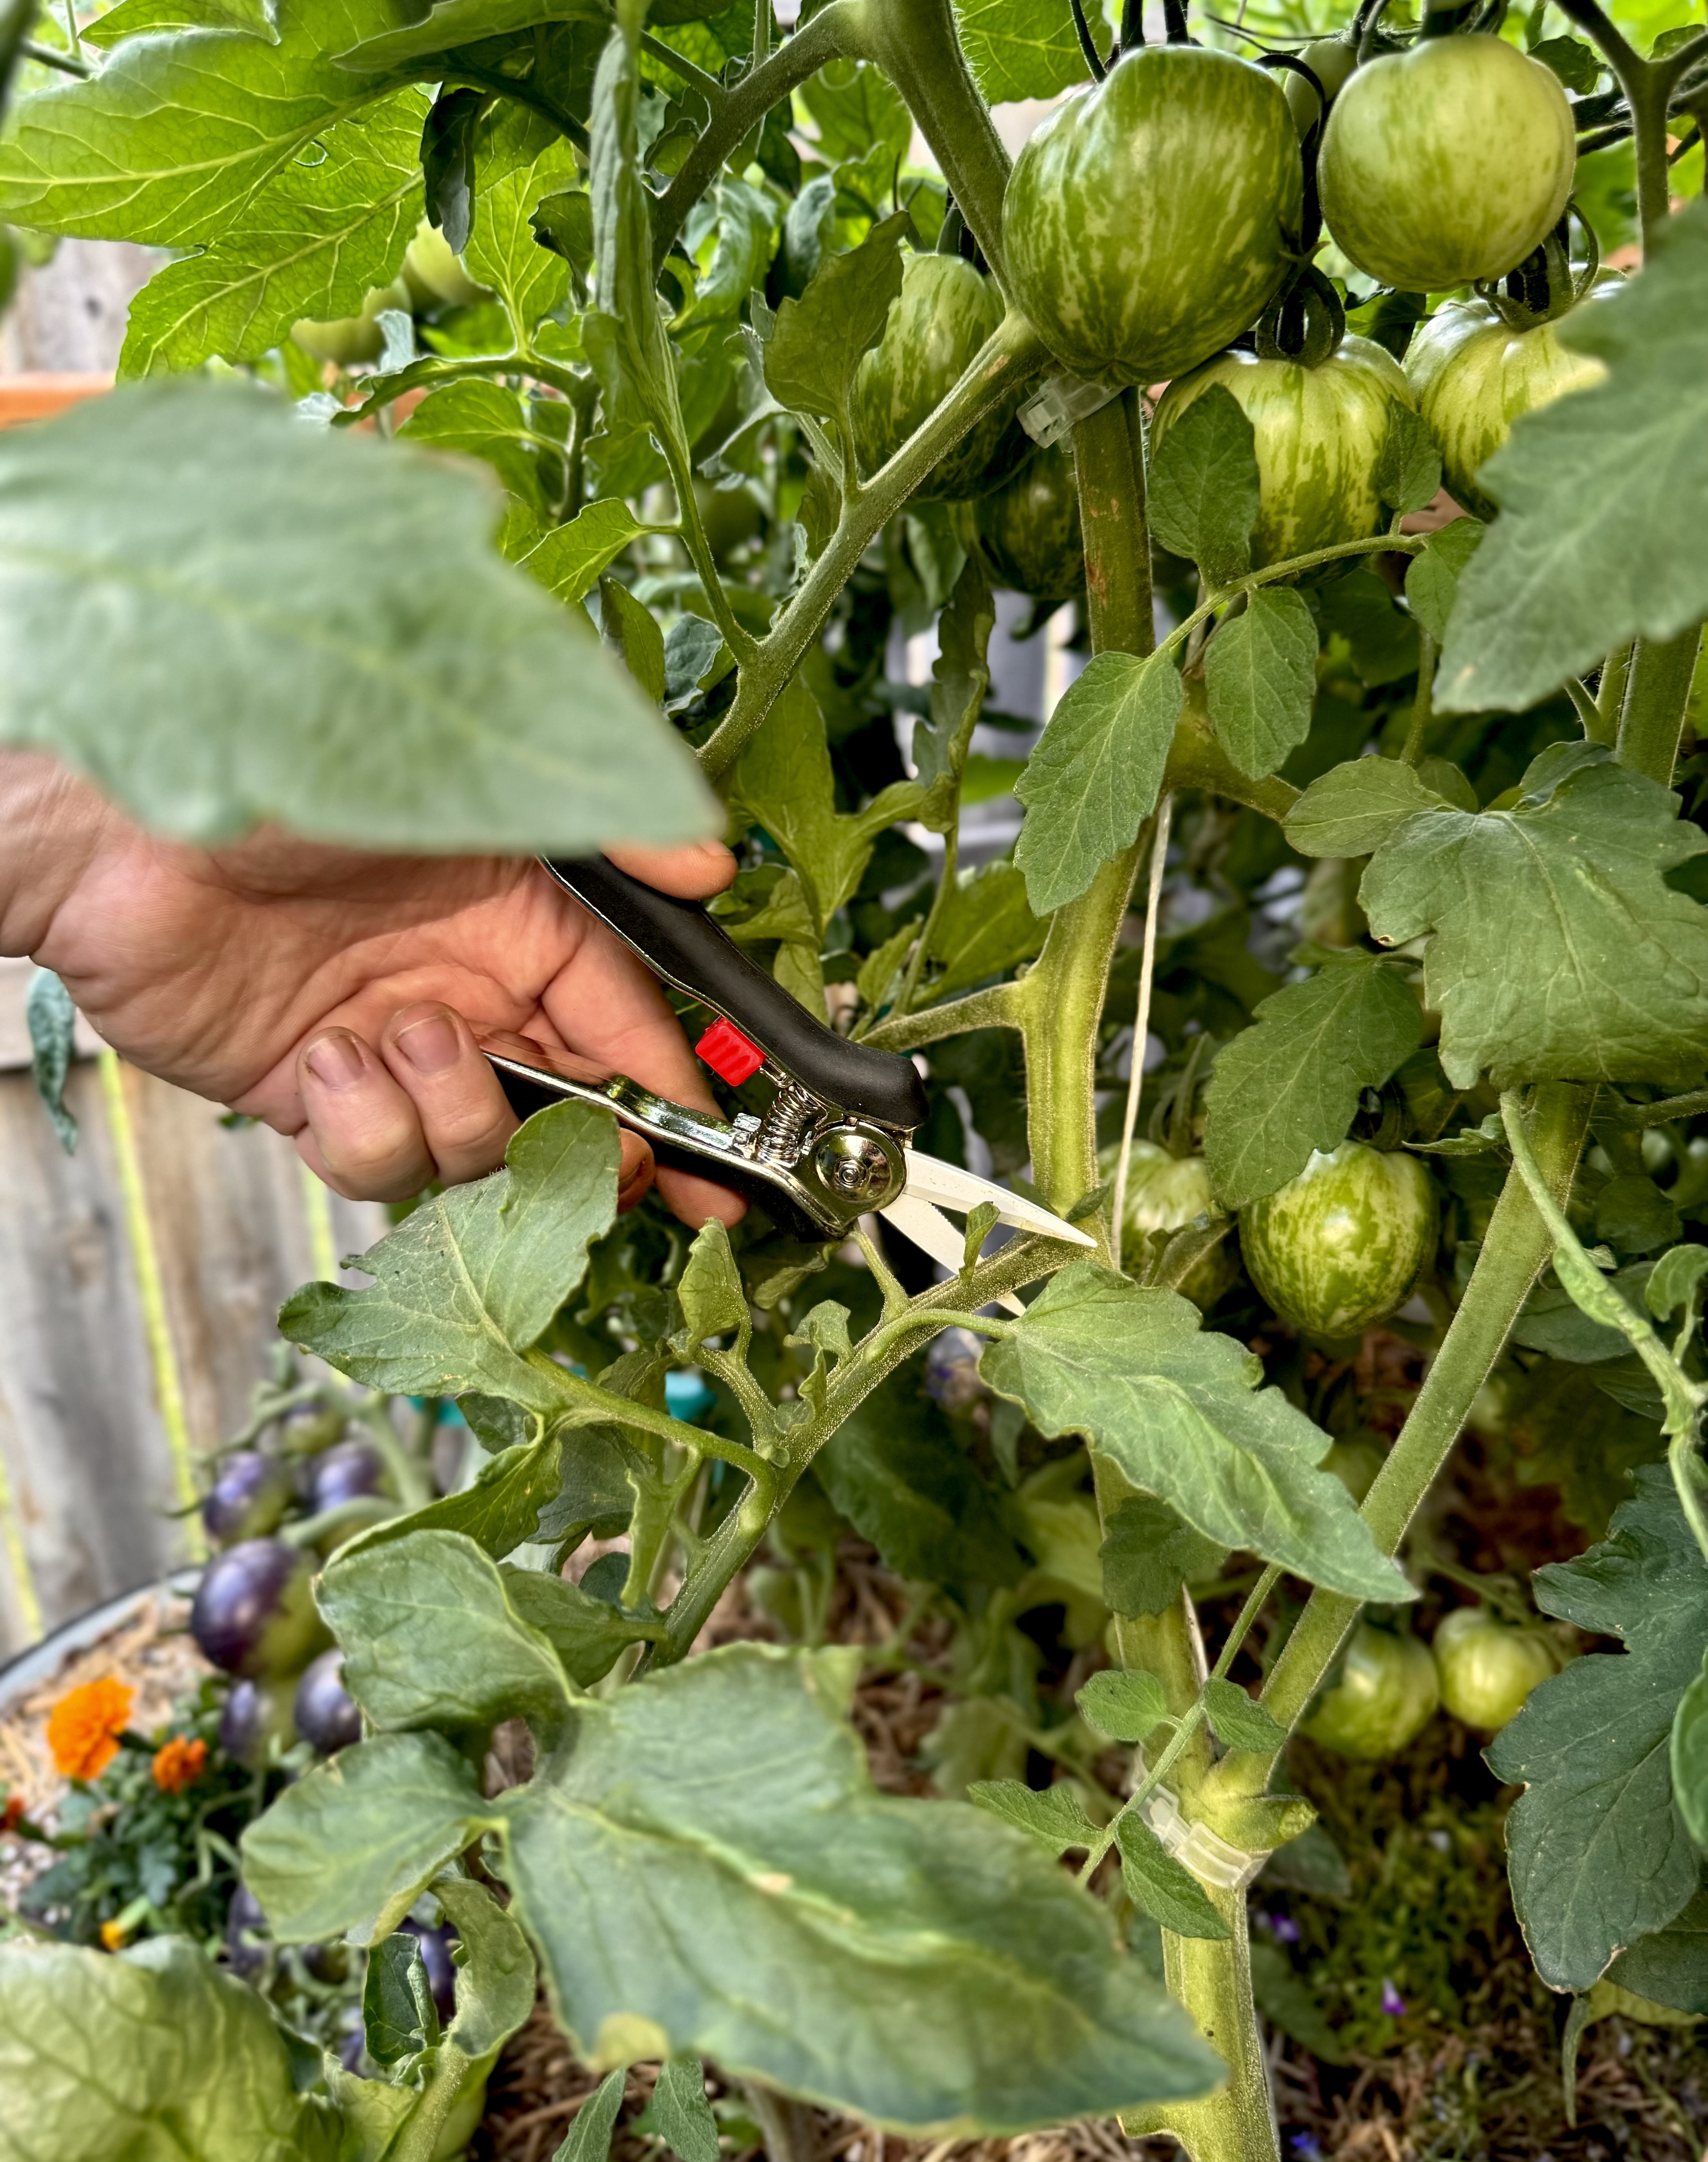
While the plants grow, every 1 – 2 weeks, I add a tomato clip onto the plant to secure the stem to the string. Plant tomatoes 1 – 2 feet apart and prune them throughout the season to leave only one main stem. NOTE: Only prune indeterminate tomatoes this aggressively because they will keep growing all season long. For that reason, like I mentioned, this trellis is best for indeterminate tomatoes.
Roller hooks allow you to adjust the string for more vertical space, known as the lower and lean method. I personally don’t think it is necessary to lower and lean when you have an eight-foot trellis, but it’s always an option! Just make sure not to lean so much that you break the stem of your plant.


0 Comments